Announcement Bar - Documentation
Announcement Bar
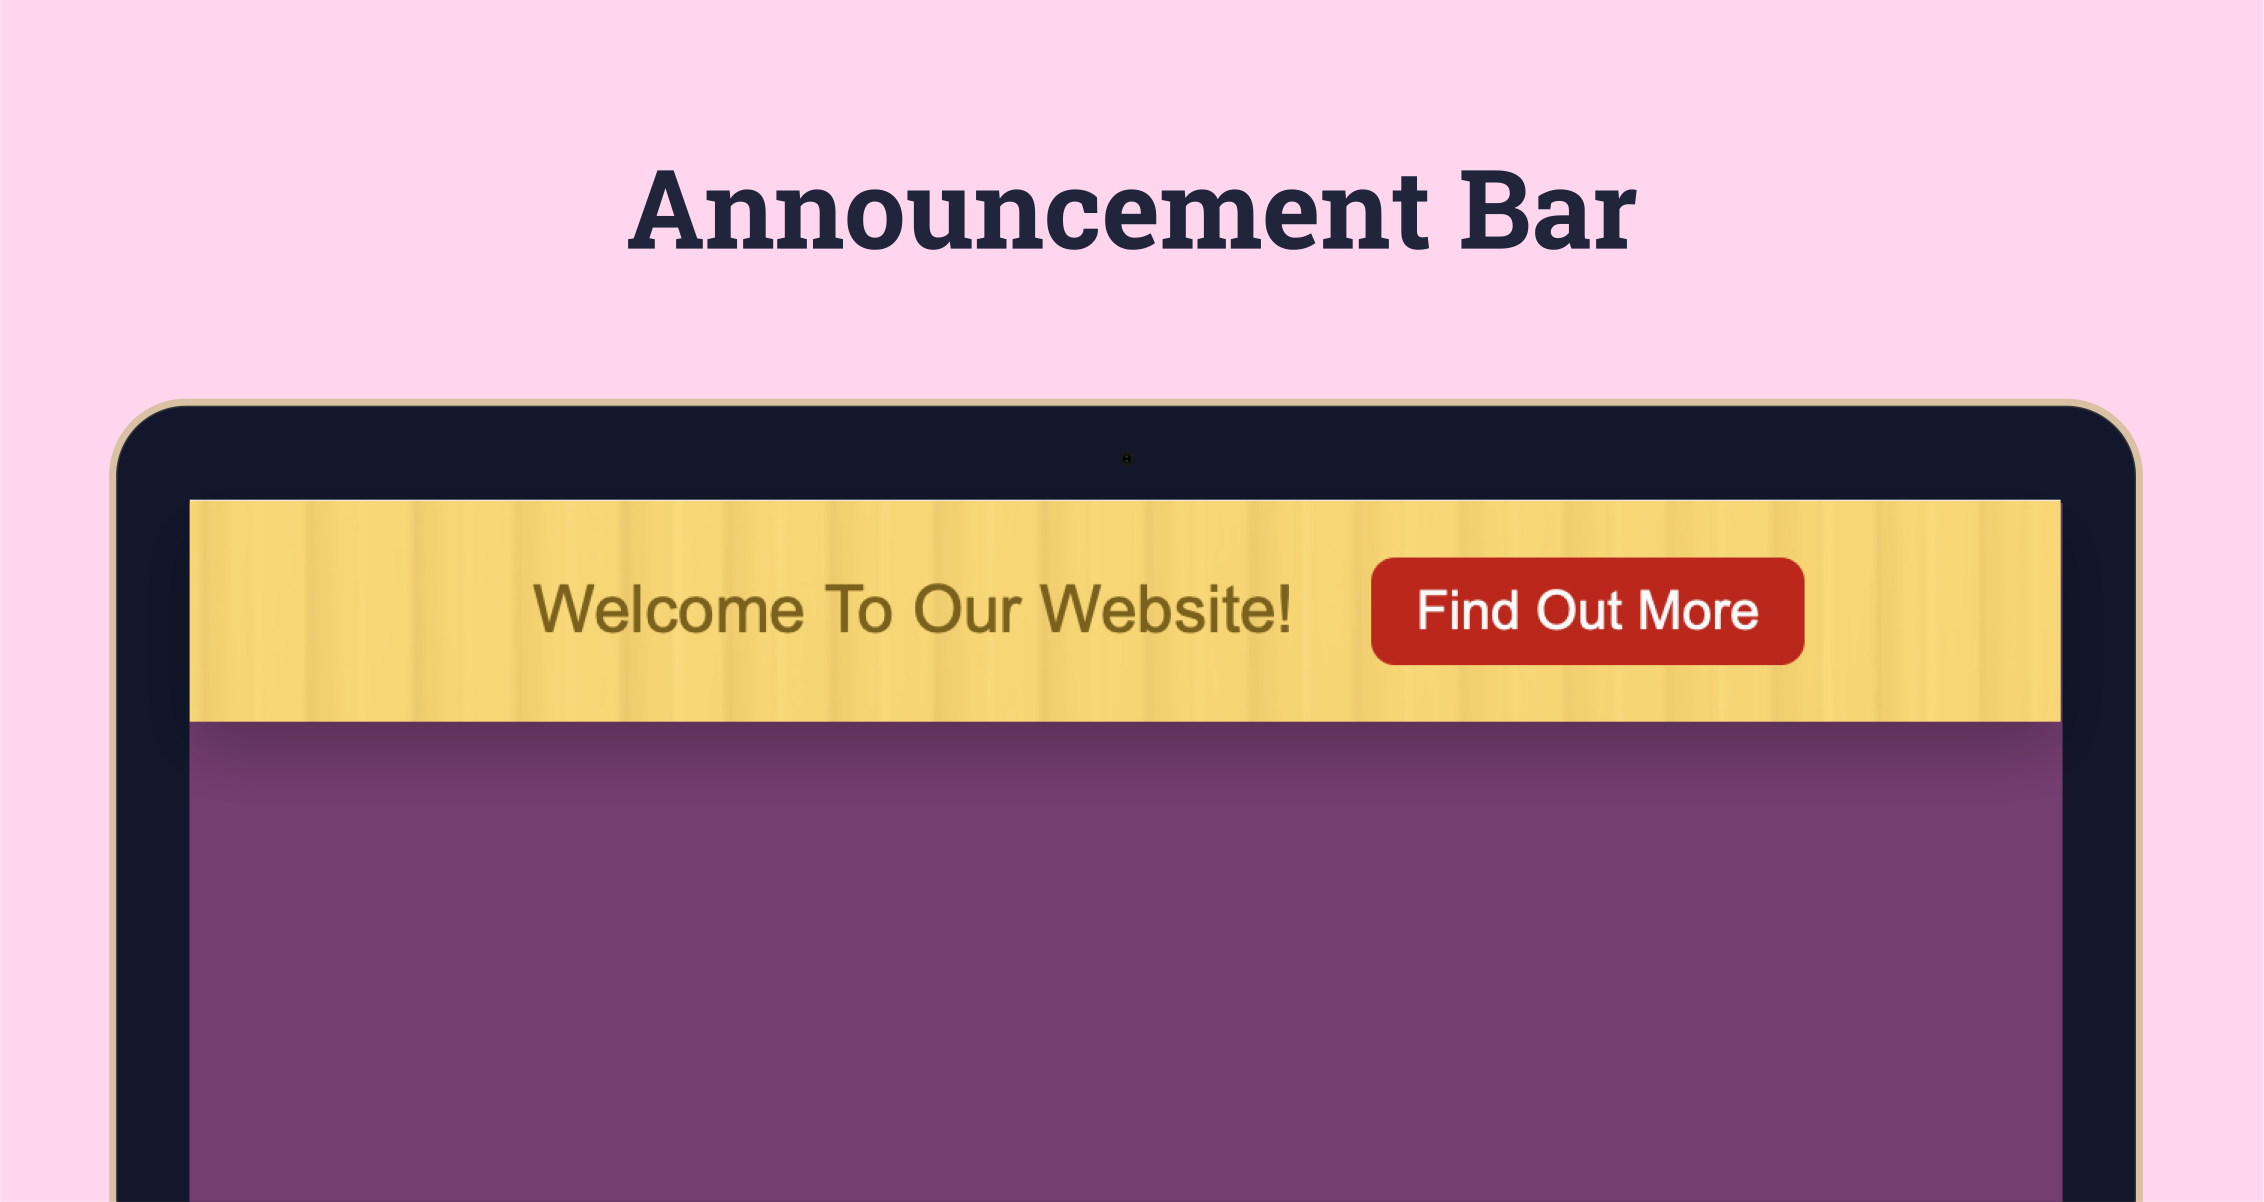
This module can be used to display an announcement / message along the top of your website / blog. The announcement bar is a global module meaning it can be installed on multiple pages but only needs to be edited once for the update to take effect across the whole site. The documentation will walk you through how to set up and install the Announcement Bar. Should you have any questions, please click on the support link to get in touch.
The announcement bar can be formatted as three options.
Options
-
Text Only - Display a simple text announcement on your website.
-
Text + Button Link - Display a text announcement and provide a link button
-
Text + CTA Button Link - Display a text announcement and provide a HubSpot CTA button
Setting Up The Announcement Bar
-
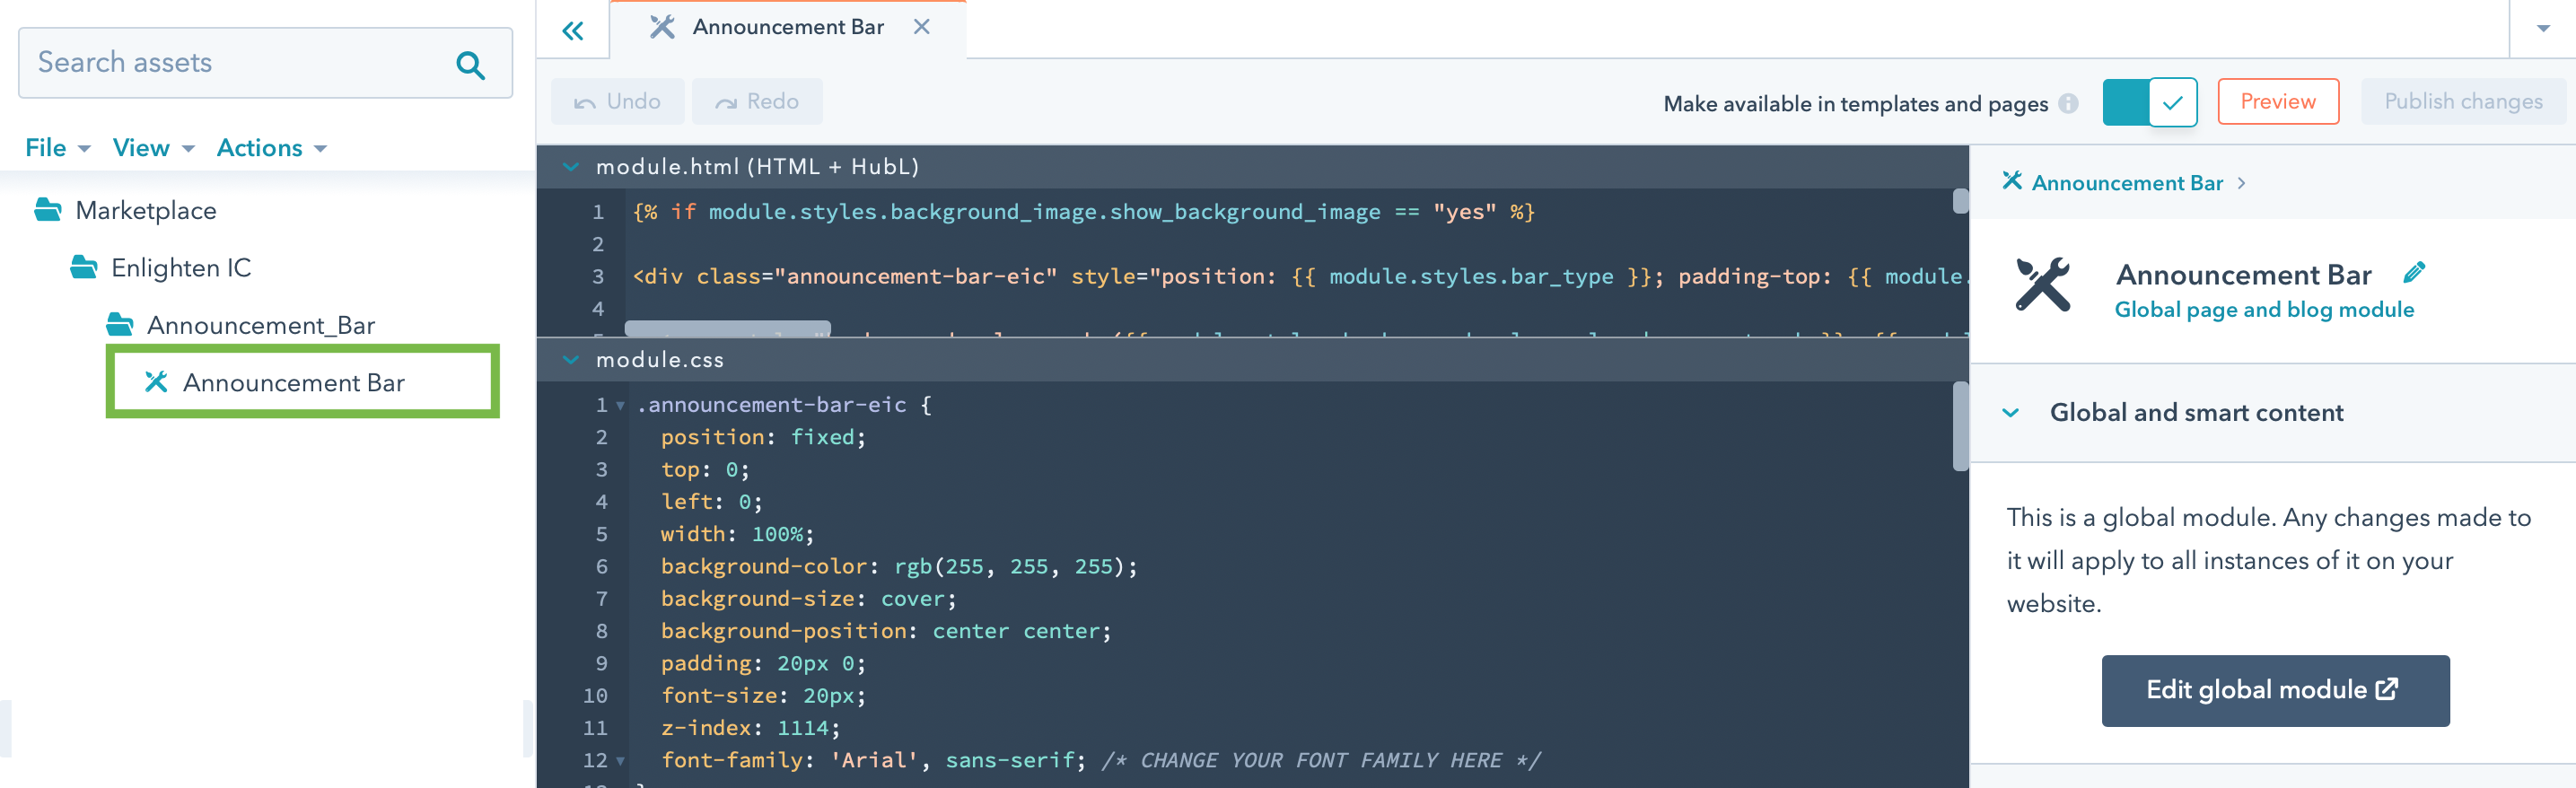
After purchasing the module from the HubSpot Marketplace the first step is to set up the module, to do this navigate to Marketing > Files and Templates > Design Manager and select Announcement Bar from the left hand side menu (It will be listed in a folder named Marketplace).
-
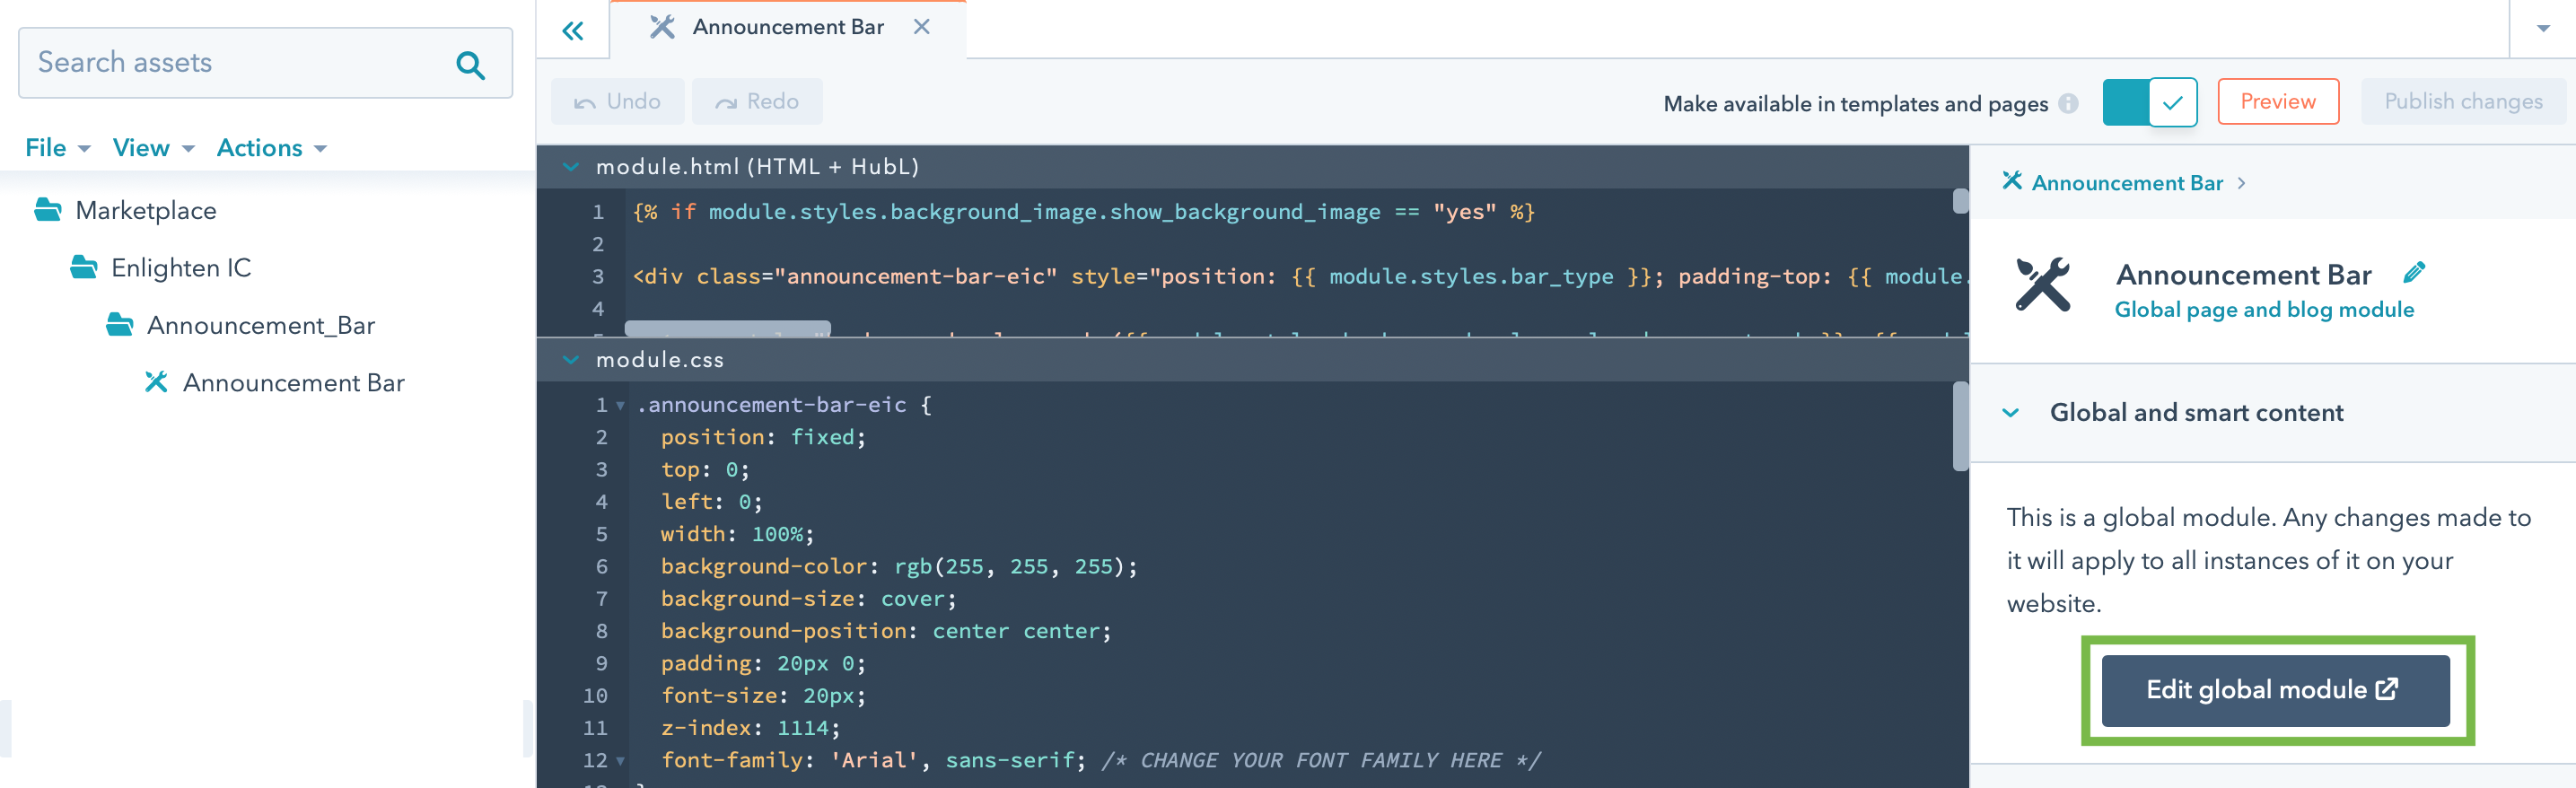
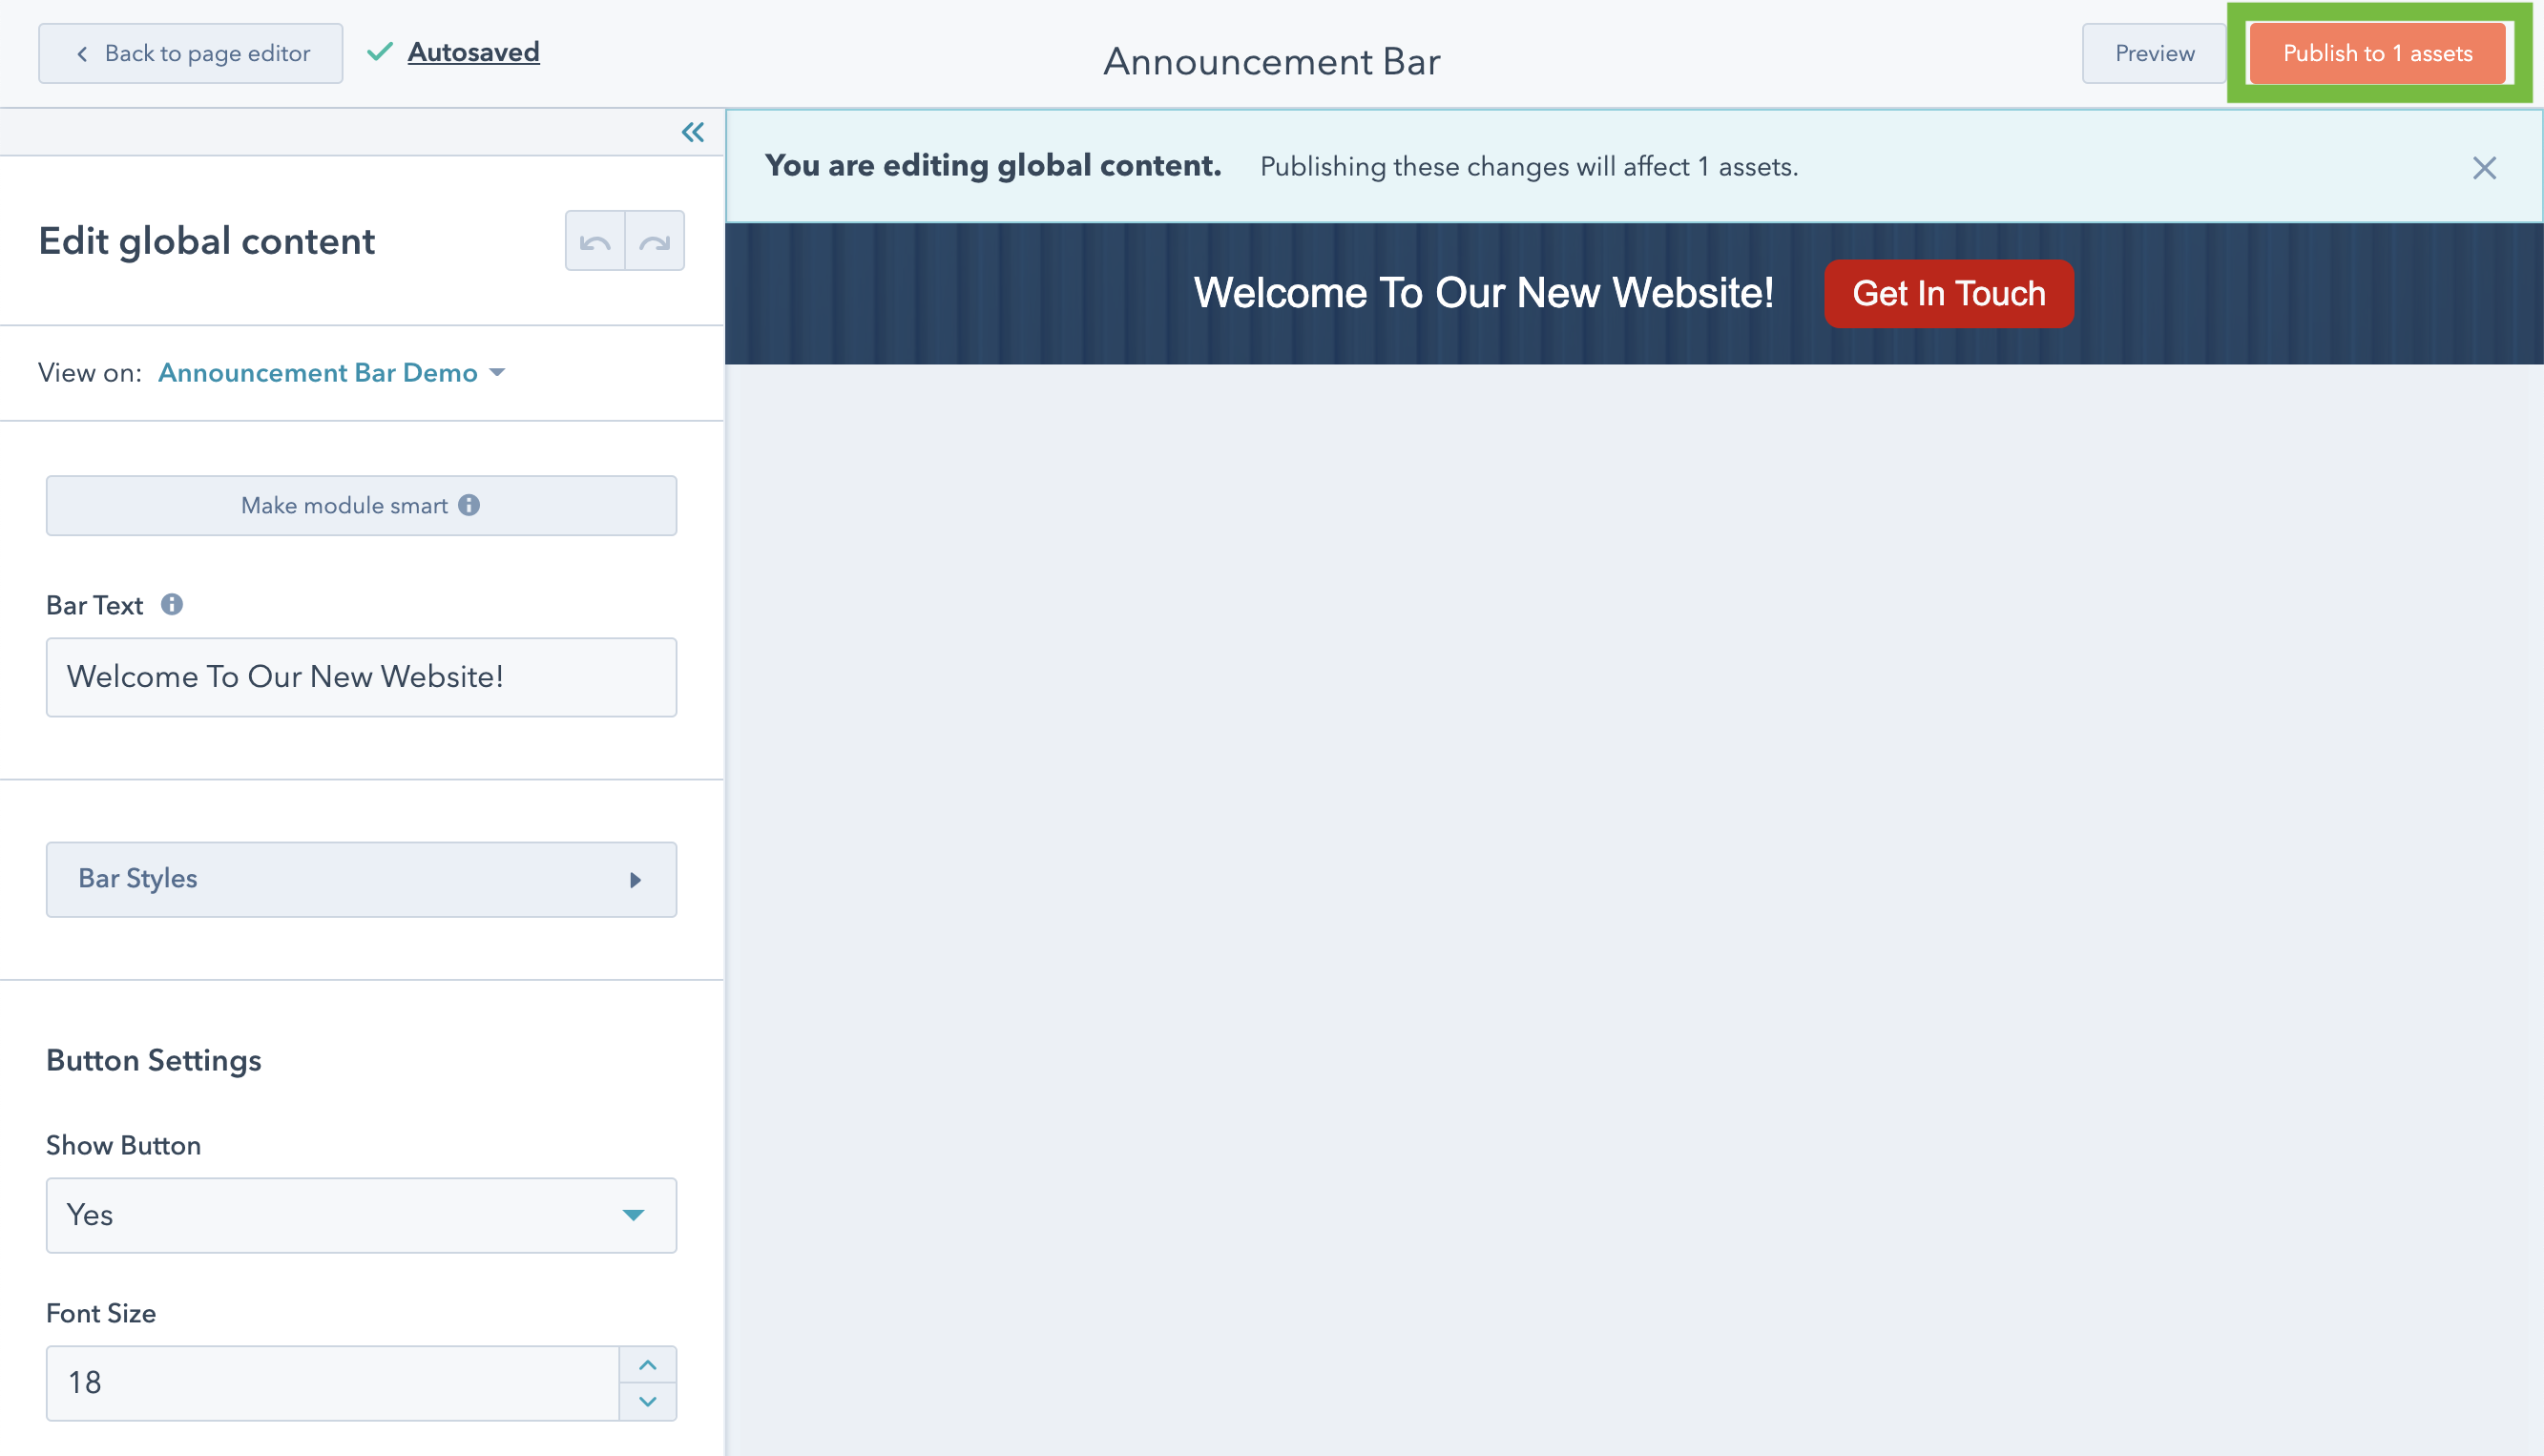
Select Edit global module from the right hand side to open HubSpot's Global Content Editor.
Adding A Message To Your Announcement Bar
The options on the left hand side are:
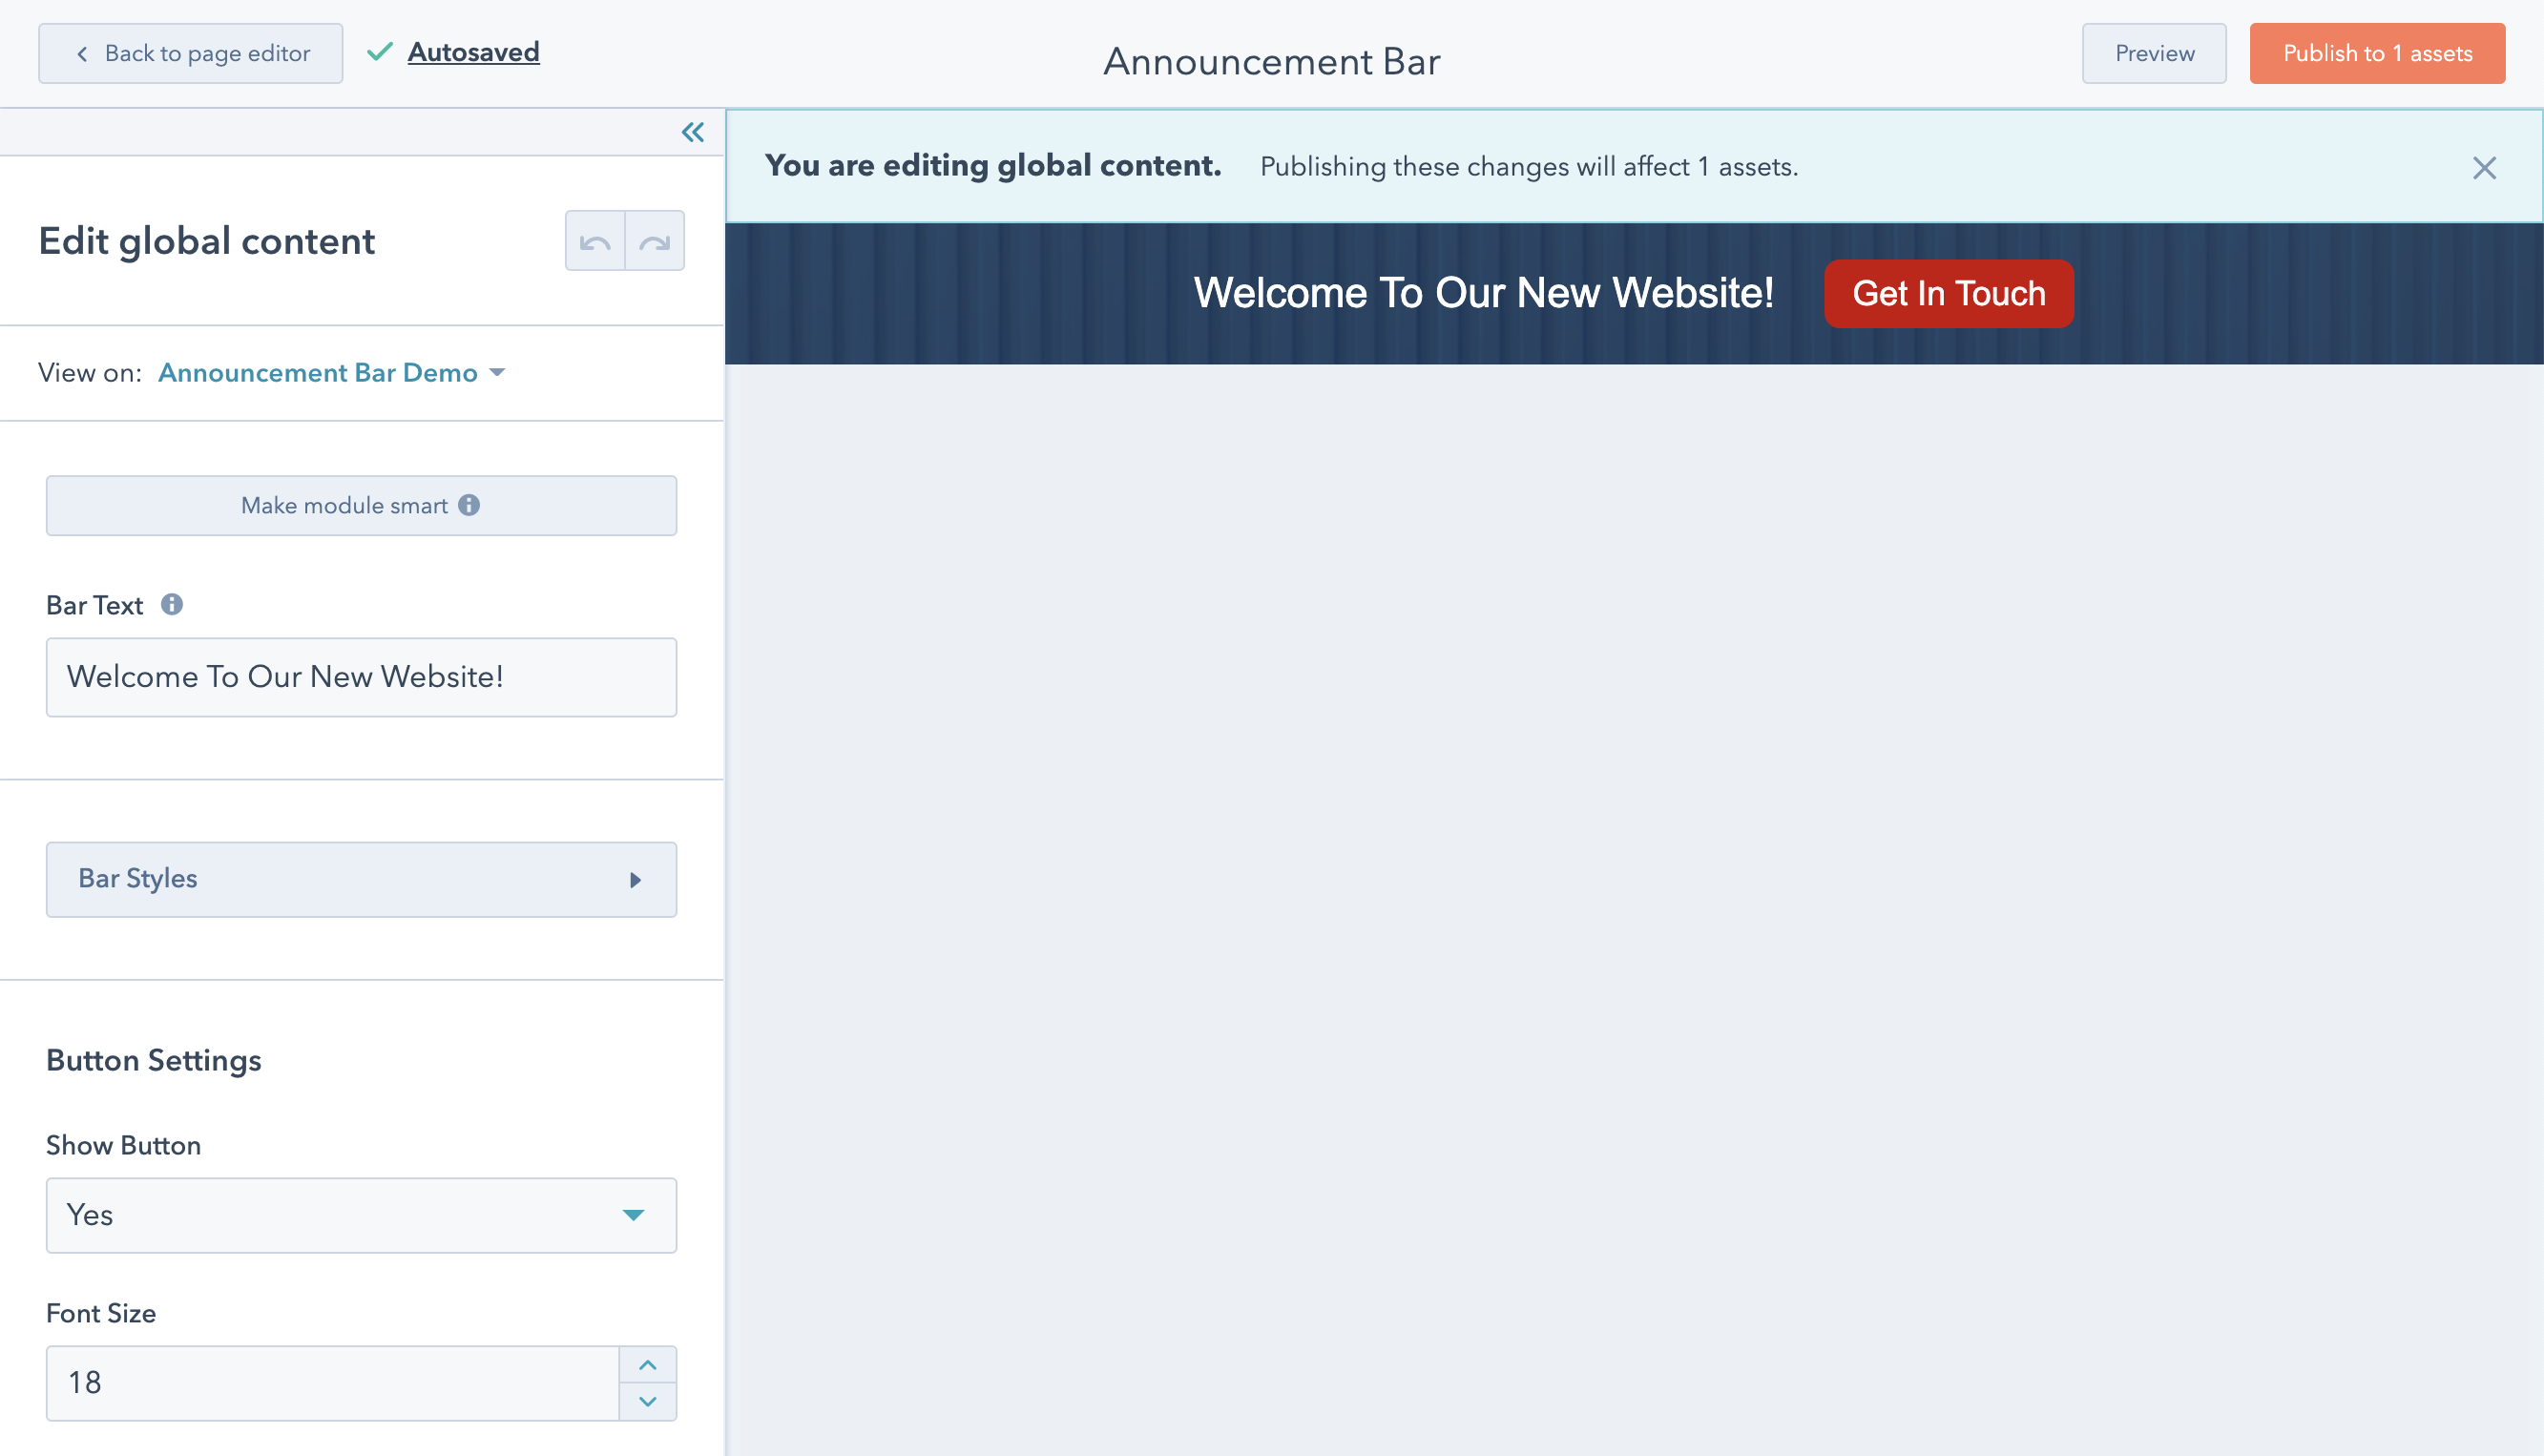
Bar Text - This text will display in your Announcement Bar. The default message is "Welcome To Our New Website!" but you can overwrite it to be whatever you wish.
Styling Your Announcement Bar
Bar Styles - This button will load the Bar Styles editing options, the options for this panel are:
Bar Type - You can choose either to display a Fixed or Static Announcement Bar. The fixed bar will dock to the top of a visitor's window as they scroll down a web page and the static bar won't, it will scroll with the rest of the page.
z-index - This option is used if you discover the Announcement Bar overlaps other elements on your web page. The element with the highest z-index will always display on top of other elements on your website. The default value is "100000000" but you may need to increase this if other elements on your website use a similar high numbered z-index.
Text Colour - This option allows you to customise the text colour of the bar.
Background Colour - This option can be used to customise the background colour of the Announcement Bar. If a background image has been applied to the bar this background colour can be tinted to provide an coloured overlay to the image.
Font Size - This option allows you to customise the CSS font-size property for the Announcement Bar.
Padding Top - This option allows you to edit the CSS property padding-top for the Announcement Bar. Changing this value will make the bar thicker or thinner.
Padding Bottom - This option allows you to edit the CSS property padding-bottom for the Announcement Bar. Changing this value will make the bar thicker or thinner.
Background Image
This section can be used to add a background image to your Announcement Bar. The options in this section are:
Show Background Image - This option can be used to enable / display a background image on your Announcement Bar. If this option is set to Yes the following options will appear:
Background Image - This is where you can select a background image and edit the options for it.
Button Settings - This is where you can choose to show a button on your Announcement Bar. The options for this panel are:
Show Button - If set to Yes then the following button styling options will appear:
Font Size - This will set the font-size CSS property of the button in your Announcement Bar.
Button Text Colour - This will set the font colour of the button in your Announcement Bar.
Button Colour - This will let you set the background colour of the button in your Announcement Bar.
Button Text - The text that will appear in your button
Button URL - This is a required field that will allow you to set the URL the button will link to.
Link Target - This allows you to set the target of the link. The value New Window will open the link in a new tab / new window as it applies the HTML attribute ‘target=“_blank”’. The value Same Window applies the HTML attribute target=“_self” and will open the link in the same window / tab.
If the Show Button option is set to CTA then you will be able to select a HubSpot CTA button to display in your Announcement Bar.
How To Install The Announcement Bar
Now you have set up the Announcement Bar you are ready to make it live on your website. There are several ways to add a HubSpot module into your website but to provide maximum flexibility and ease of control we recommend you follow the process below:
-
When you have finished editing the Announcement Bar, click the Publish button on the top right to save your changes and then navigate to Marketing > Files and Templates > Design Manager and select a page template you would like to show the Announcement Bar on.
-
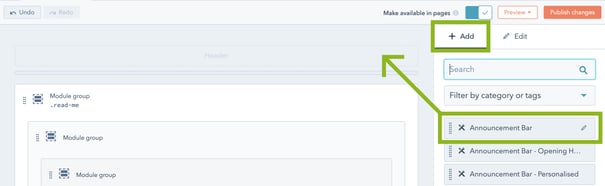
If you are using HubSpot's drag and drop editor then on your page template select Add+, choose Announcement Bar and drag it into the Header section of your page template.
-
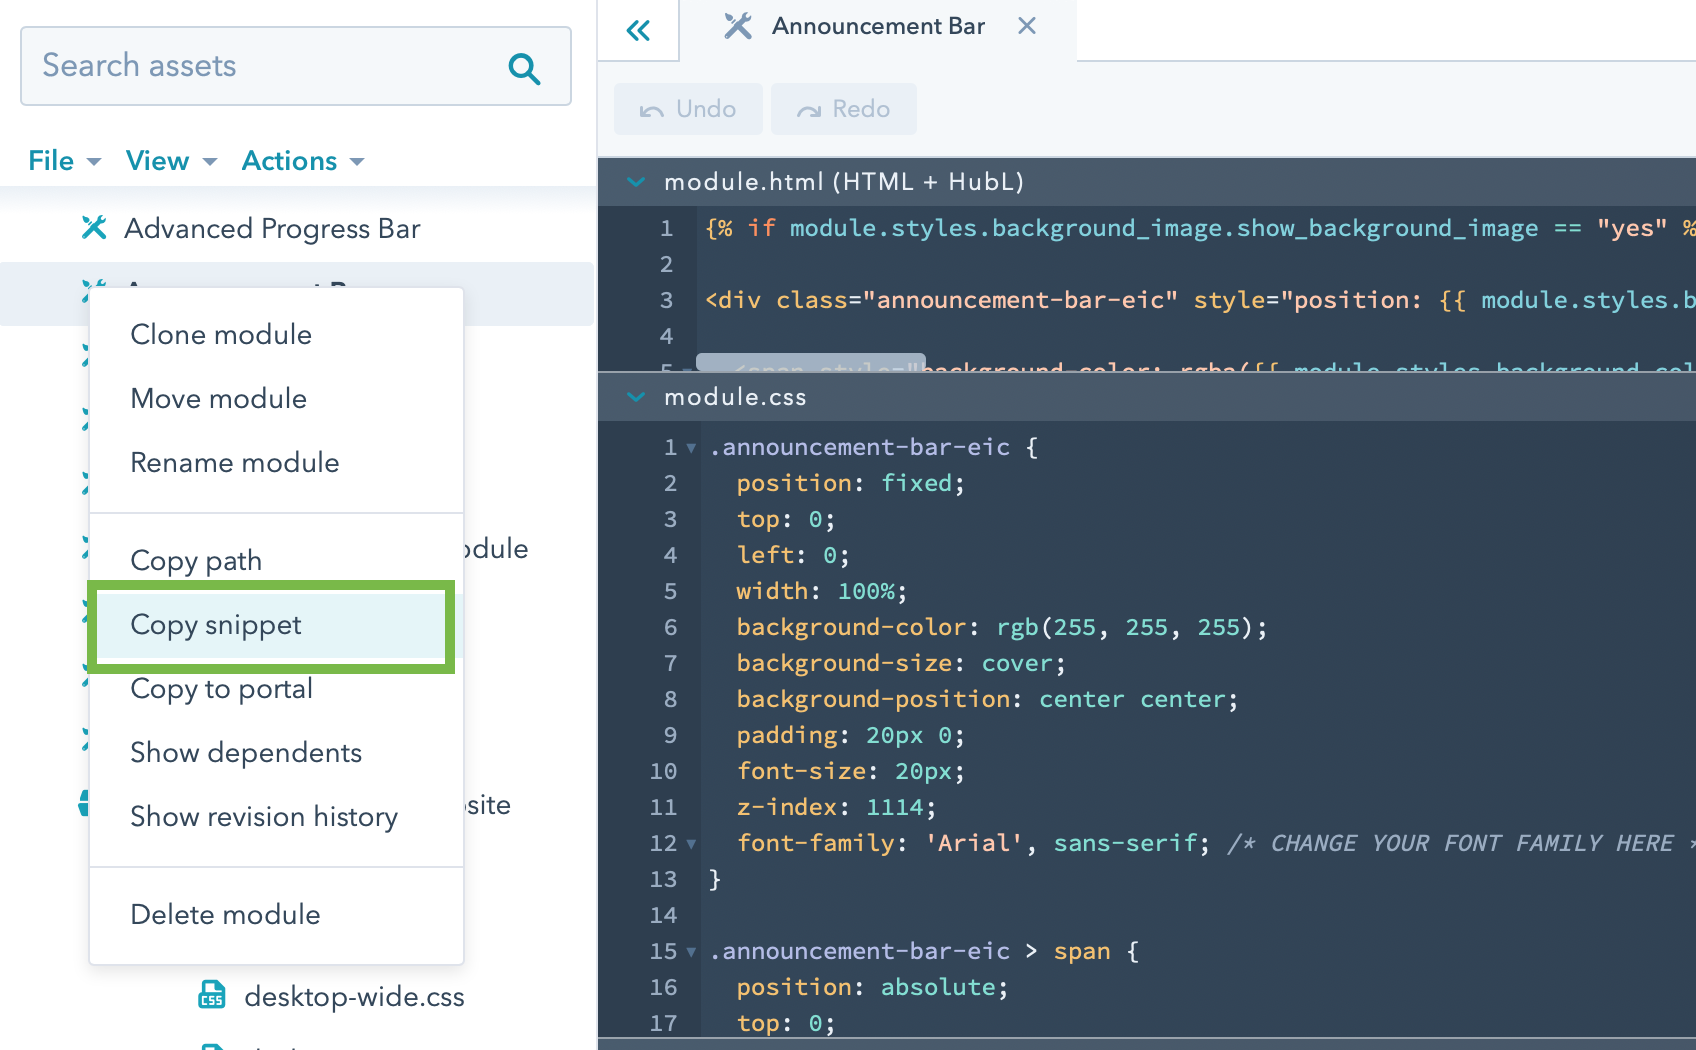
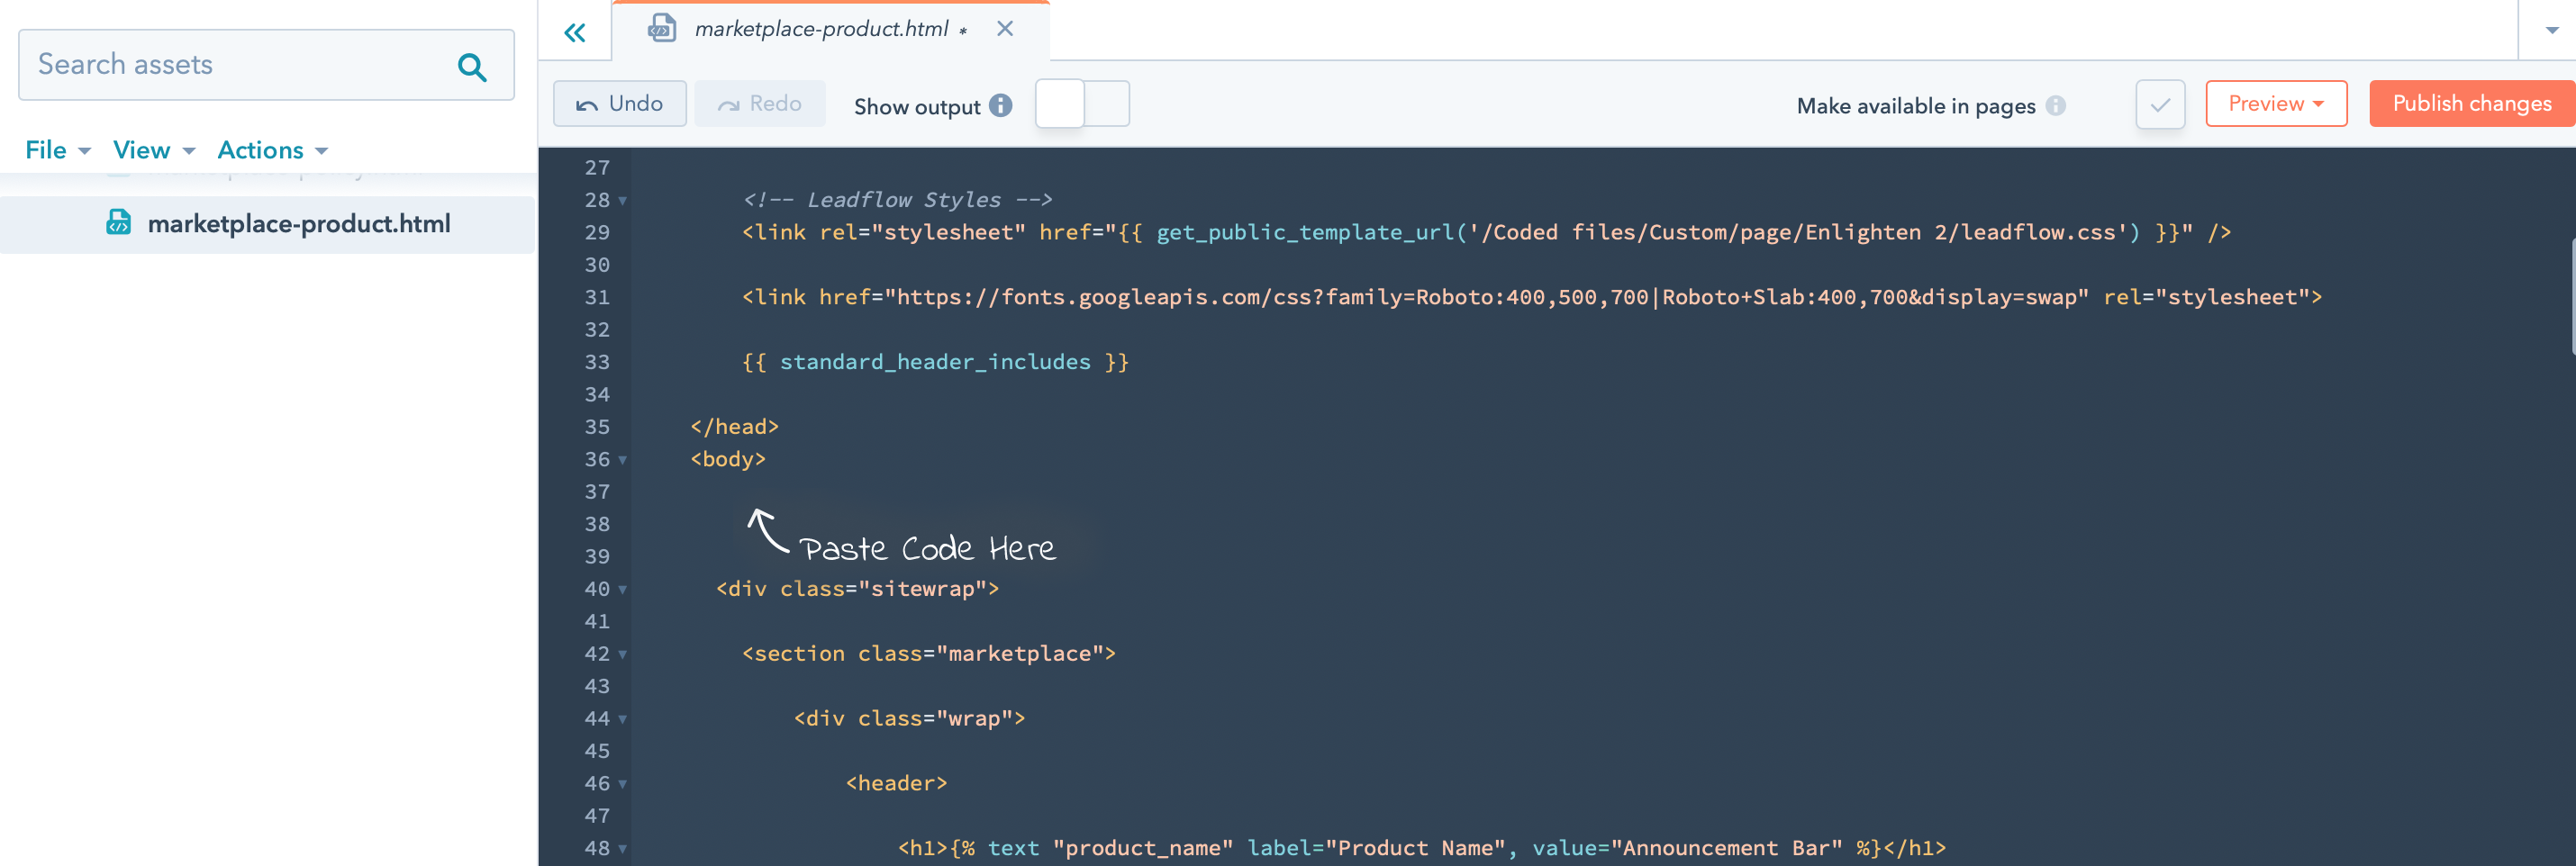
If you are using HubSpot's HTML editor to build your templates you will have to copy the module's snippet and paste it at the top of your HTML document, just inside the <body> element.
-
Click Publish Changes on your template to make your Announcement Bar live on all pages using this template.
-
Repeat steps 1-5 for each template you wish to include the Announcement Bar on.
CSS Styles
This module has been designed to be as flexible as possible. All the CSS required to style the Announcement Bar is included within the module. It can be edited to suit your needs although we recommend using the built-in styling options as we can’t take responsibility for any CSS edits you make that break the module (or your website).
Final Thoughts
We have tried to build as much functionality into this module as possible without making it too complicated. If, however, you have specific requirements for your business, please get in touch and we will see if this module can be customised further to meet your needs or if a bespoke module would be more appropriate.
Looking For
Custom Development?
We provide development solutions for companies and agencies who need help building their websites from scratch or adding custom functionality along the way
Get In Touch