Emergency Notification Module - Documentation
Emergency Notification Module
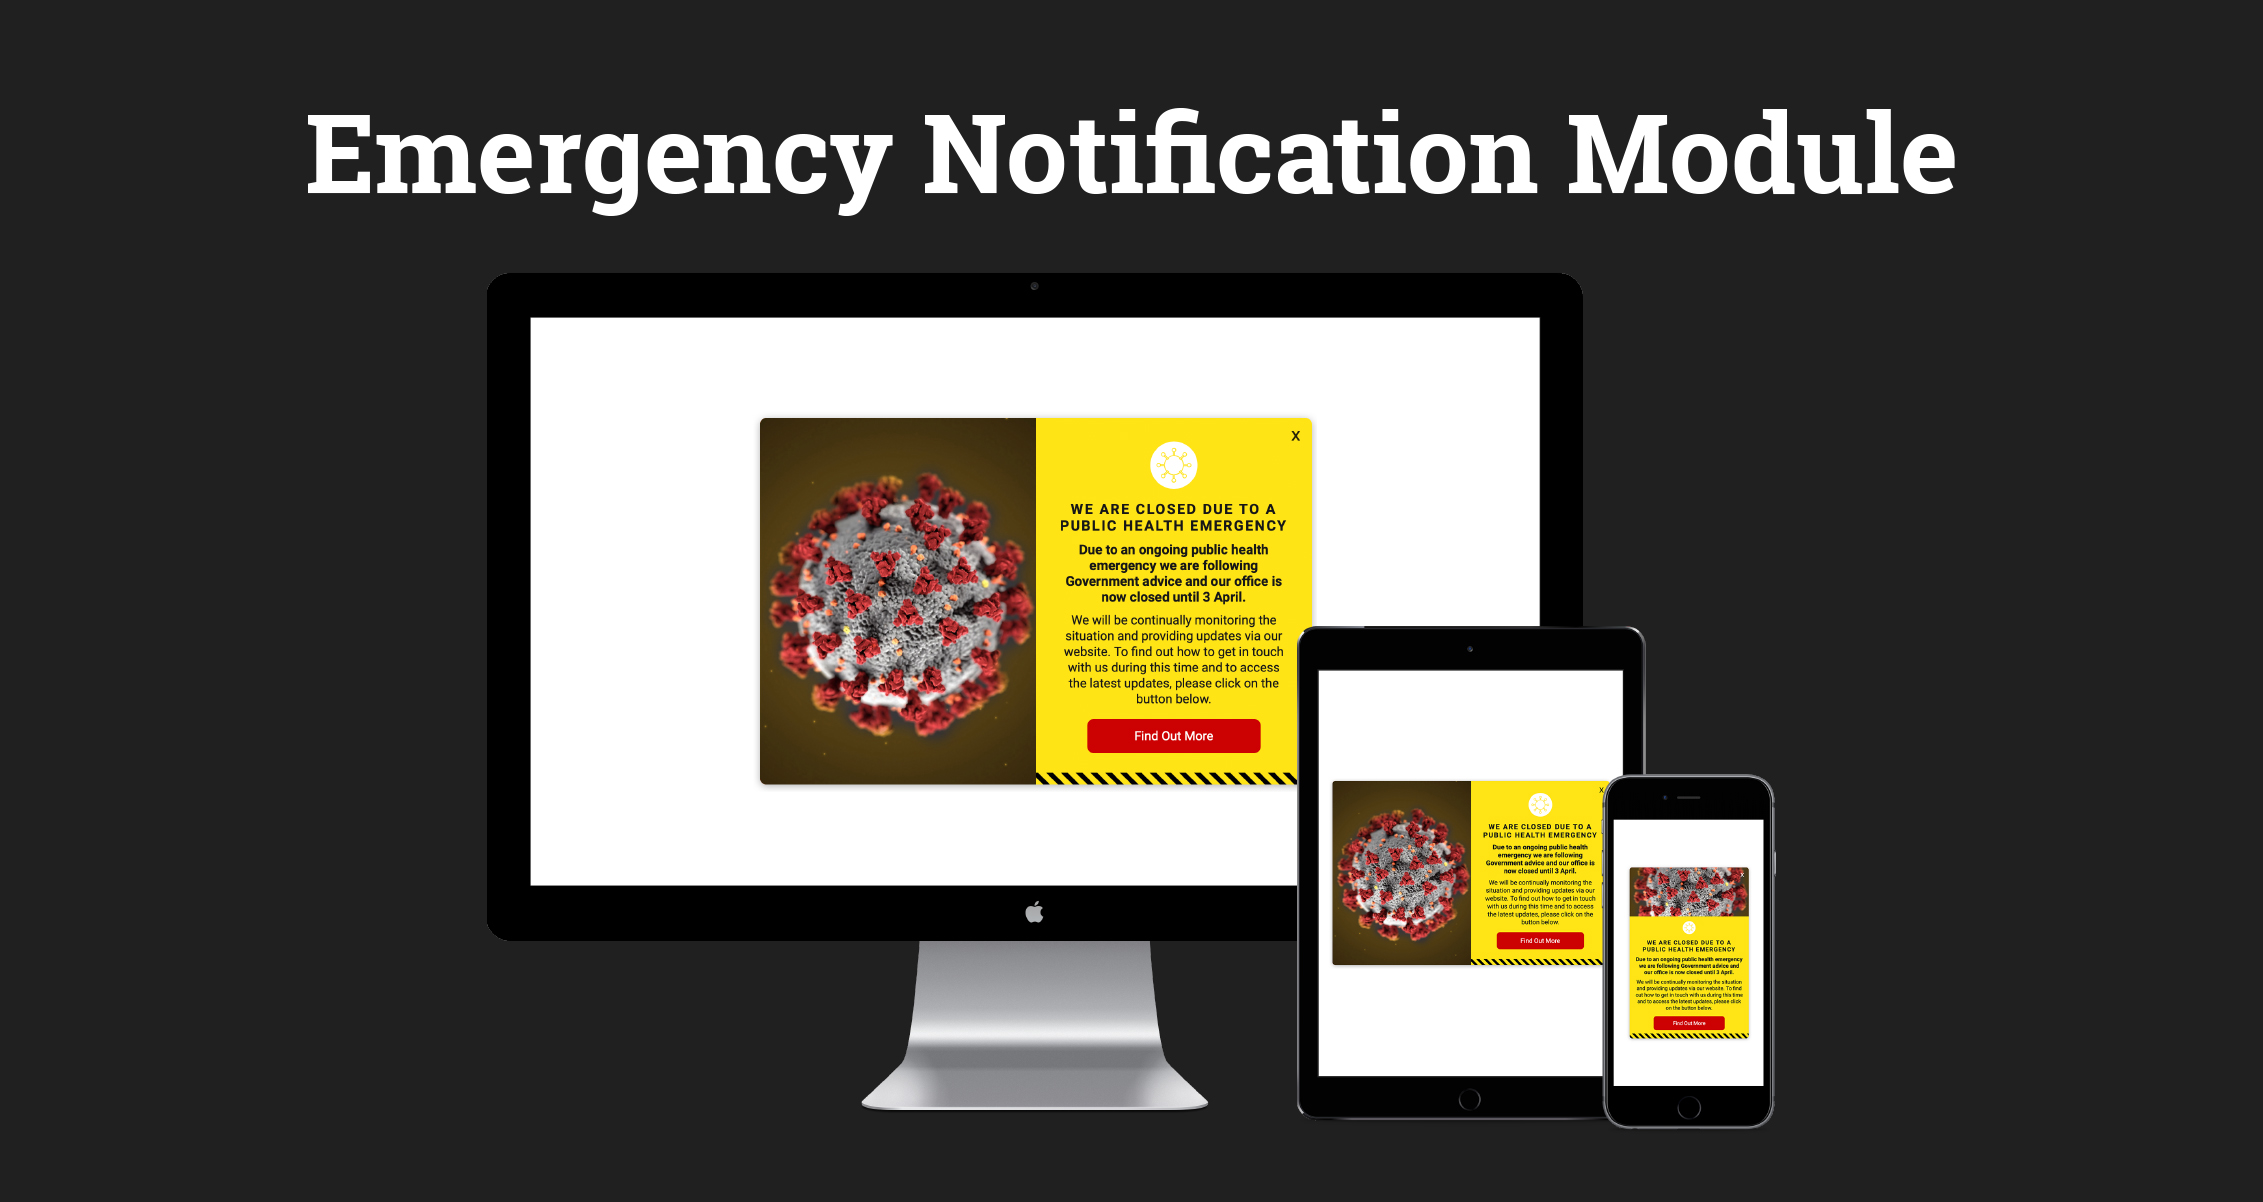
This module makes it easy for you to add an Emergency Notification to your website in three different forms (Announcement Bar, Pop Up or Slide In CTA). The documentation will walk you through how to set up and install the Emergency Notification Module. Should you have any questions, please click on the support link to get in touch.
Setting Up The Emergency Notification Module
-
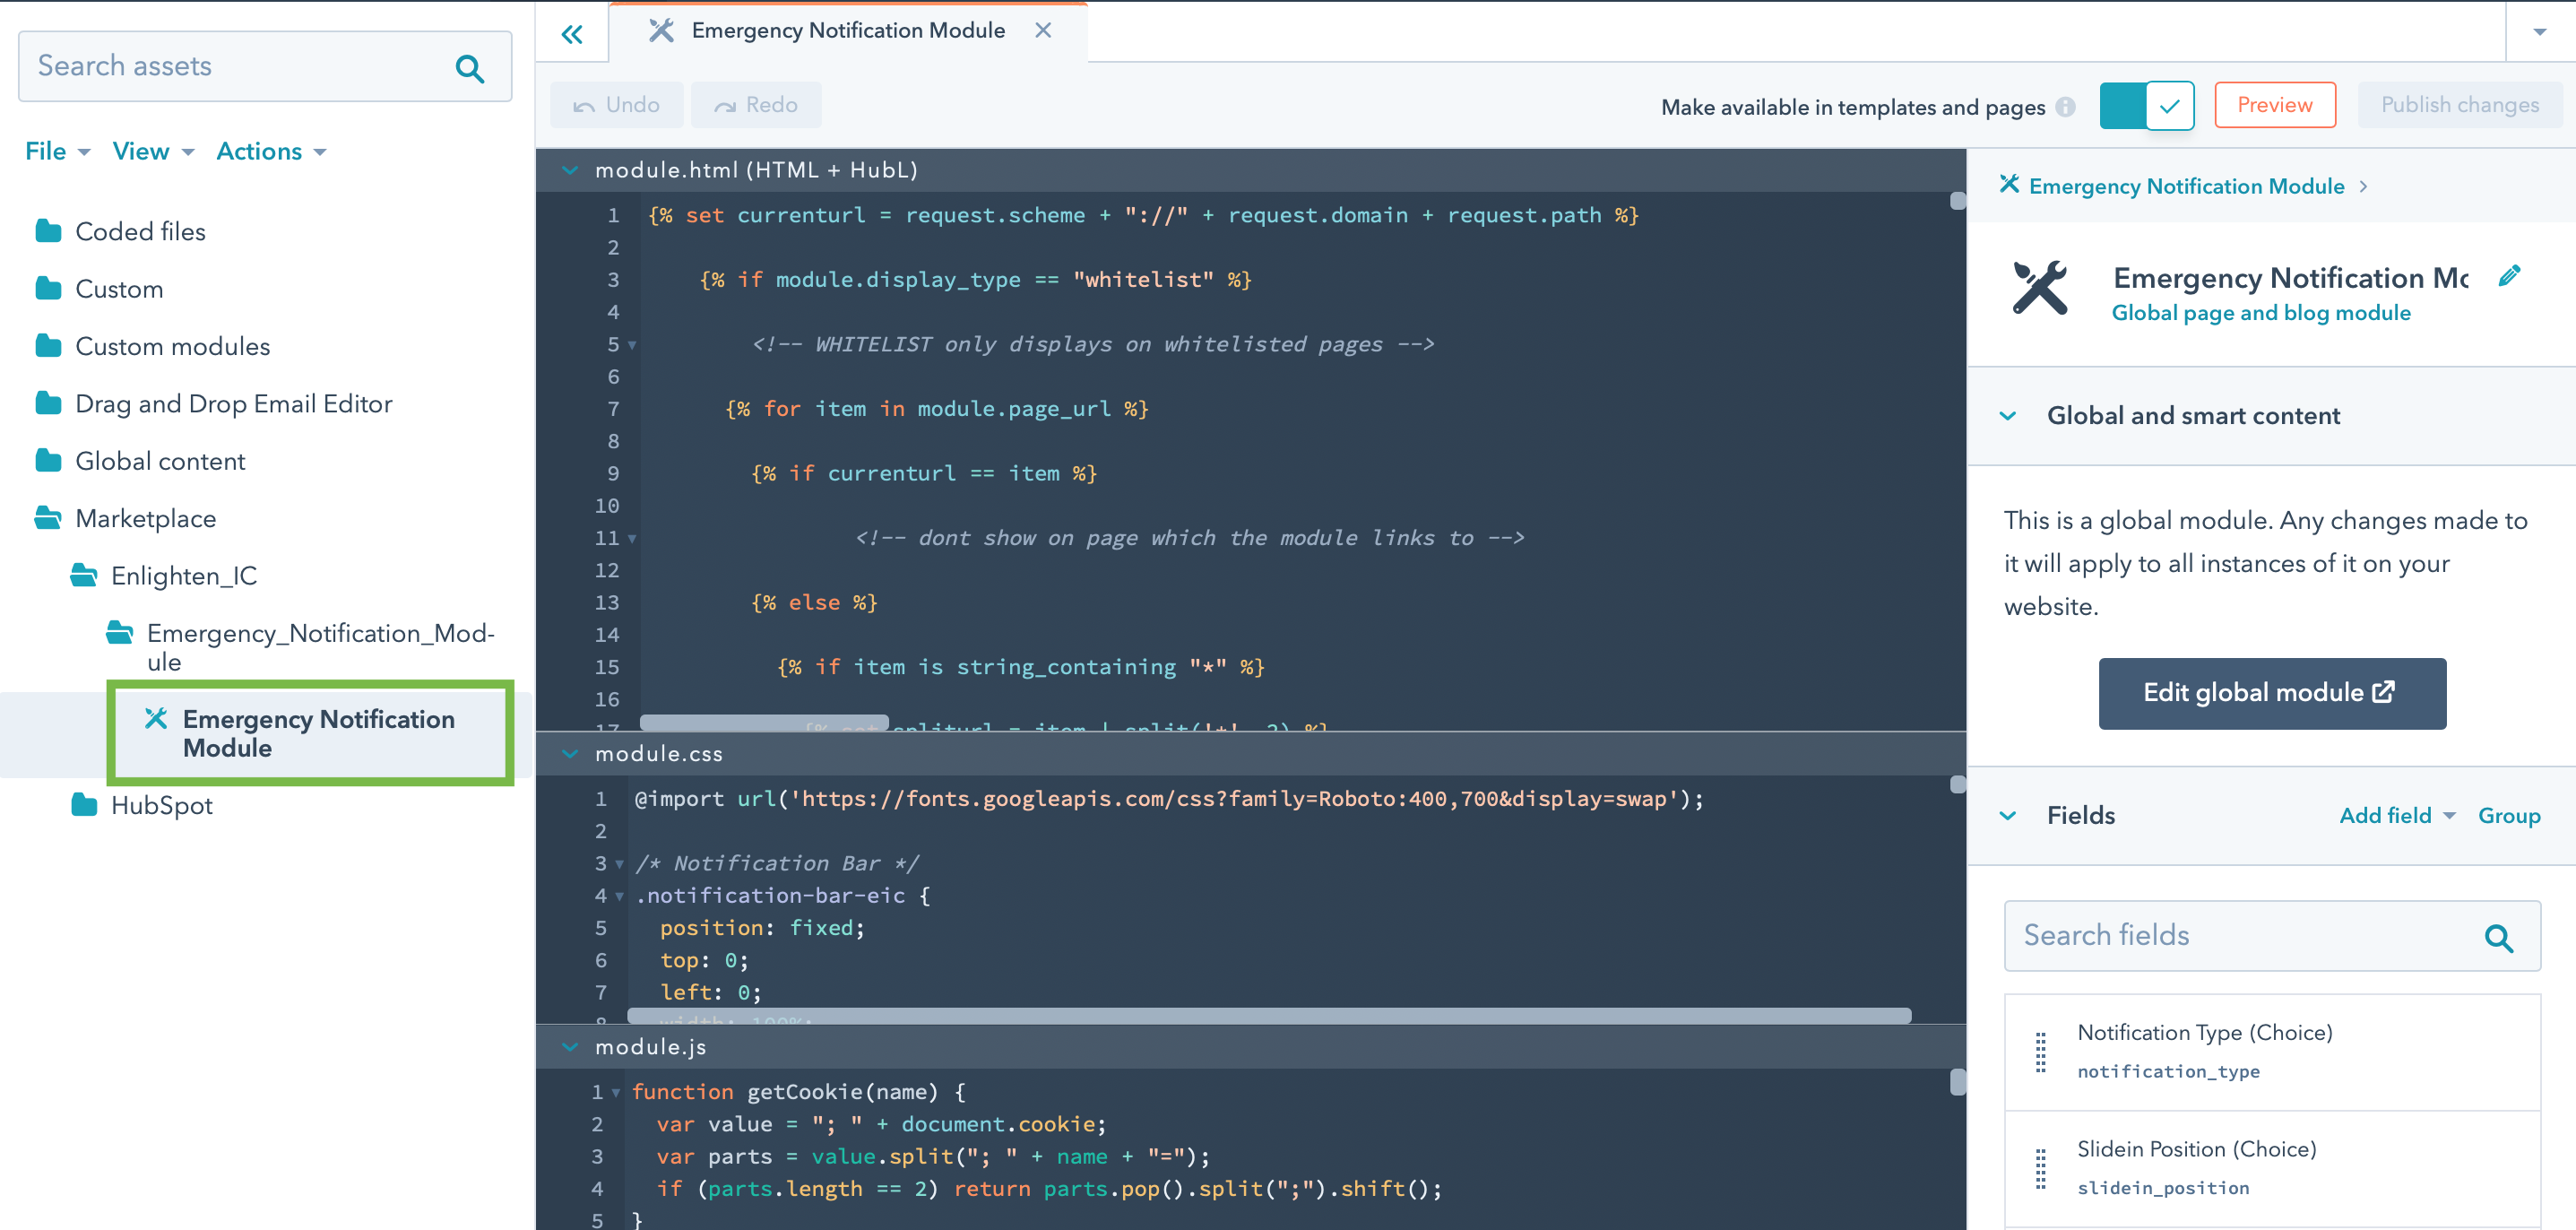
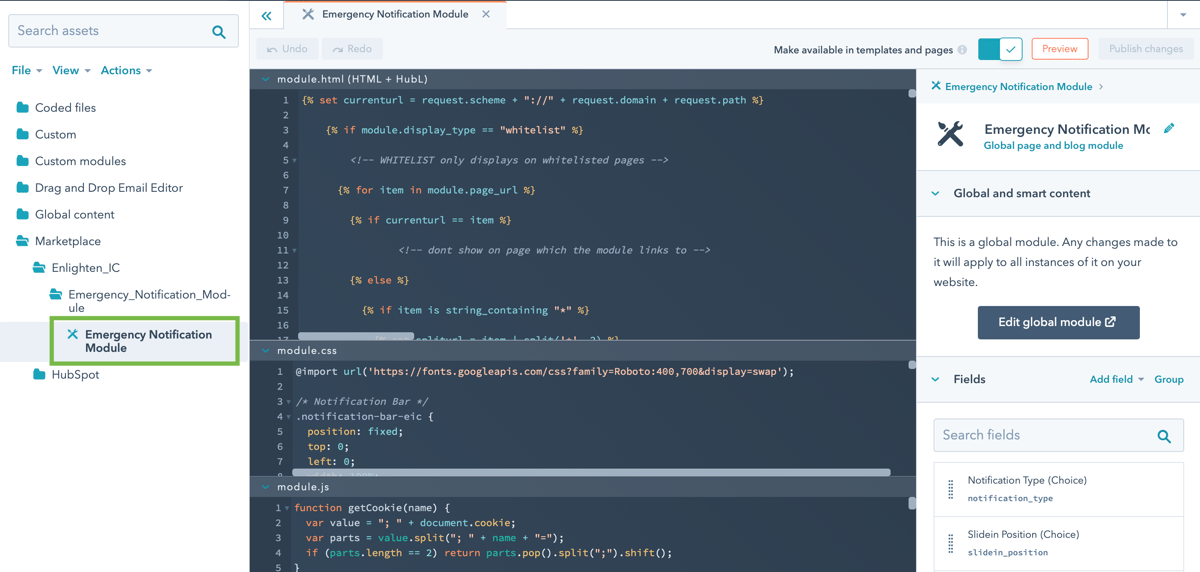
After purchasing the module from the HubSpot Marketplace the first step is to set up the module, to do this navigate to Marketing > Files and Templates > Design Manager and select Emergency Notification Module from the left hand side menu (It will be listed in a folder named Marketplace).
-
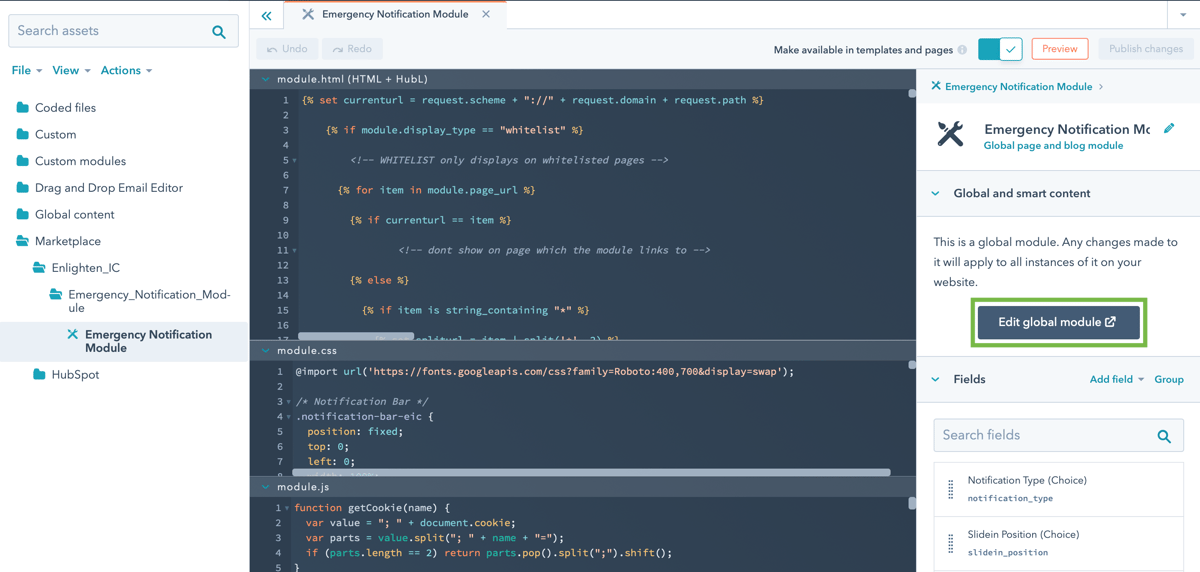
Select Edit global module from the right hand side to open HubSpot's Global Content Editor.
Choose Which Type Of Notification
-
The options on the left hand side are:
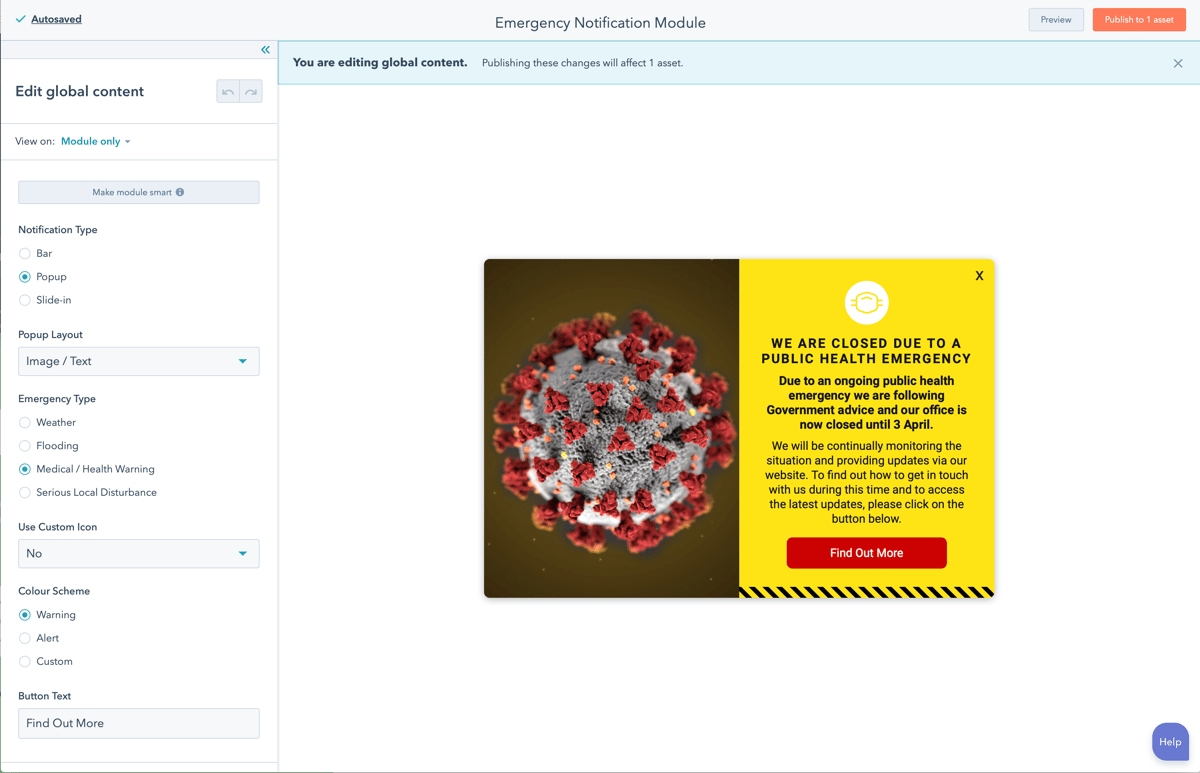
Notification Type - This option allows you to choose which type of notification module to display on your website. The Emergency Notification Module will display as a Popup by default. The types of notification you can display on your website are:Bar - This will display an Announcement Bar at the top of your website which will contain the emergency message. If you select this type of notification an option for Notification Bar Option will appear and allow you to choose whether or not to dock the notification bar to the top or bottom of a visitor's screen. By default the emergency notification bar will dock to the top of a visitor's screen.
Popup - This will display an Emergency Notification Popup in the middle of your website. If you select this type of notification an option called Popup Layout will appear and allow you to choose between a Simple layout and an Image / Text layout. If you select Image / Text a default image will be included in your popup. You can replace this image if you wish.
Slide-in - This option will display a Slide-In Emergency Notification. If you select this type of notification an option called Slidein Position will appear which will allow you to choose where the module docks on a visitor's screen. The options are top left, top right, middle left, middle right, bottom left, bottom right. The default value is middle right.
Choose The Type of EmergencyEmergency Type - This option allows you to choose which type of emergency your notification will display. Adjusting this option will also control the type of icon that is associated with your emergency. The options available are:
Weather - This option will display a lightning blot icon and can be used if your business is effected by adverse weather conditions.
Flooding - This option will display a flowing water icon and can be used if your business is effected by flooding or water related issues.
Medical / Health Warning - This option will display a virus icon and can be used if you business is effected by public health warnings, mass lockdowns or other medical events.
Serious Local Disturbance - This option will display a warning icon and can be used if your business is effected by serious local disturbances which could pose a threat to life.Use Custom Icon - This option allows you to choose a custom icon if you would like to overwrite the default icon. For best results your icon should be setup as an SVG image 50px x 50px. Please note HubSpot will not verify your image meets these requirements so it's important you double check your icon is set up correctly to prevent display issues.
Styling Your Notificationsz-index - This option is used if you discover the Emergency Notification Module overlaps other elements on your web page. The element with the highest z-index will always display on top of other elements on your website. The default value is "100000000" but you may need to increase this if other elements on your website use a similar high numbered z-index.
Colour Scheme - This option allows you to control the colour scheme that will apply to your notification. The options available are:
Warning - This will display a yellow background and include black chevrons.
Alert - This will display a red background.
Custom - This will allow you to choose a custom background colour for your notification.Button Text - This option allows you to control the text which is displayed on the button which is displayed in your notification. Please note, the less text used the better so that the button can display properly on mobile devices
-
In the second section Button Settings you can control the styling of the button on your notification. The options are:
Button Colour - This option will allow you to update the background colour of the button that is displayed in your notification.
Button Text Colour - This option will allow you to update the text colour of the button that is displayed in your notification.
The following options are used to increase the size of your button
Padding Top - This allows you to edit the css padding-top value of the button
Padding Bottom - This allows you to edit the css padding-bottom value of the button
Padding Left - This allows you to edit the css padding-left value of the button
Padding Right - This allows you to edit the css padding-right value of the button
Border Radius - This allows you to set the border-radius of your button -
You can choose where your module links to using the notification link options. By default this value is left empty so it is important to make sure you update it to prevent a visitor being presented with an empty (or broken) link.
Adding A Message To Your Module
Depending on which Emergency Type you selected the title of the next section will update to be either, Weather Emergency, Flooding Emergency, Medical Emergency or Local Disturbance. The options here differ depending on which notification type you have selected. If you have selected Bar as your notification type the options here will be:
Text - This text will display in your notification bar. It will be pre-filled with default text relating to your emergency type but you can overwrite it to be whatever you wish.
If you have selected either Popup or Slide-in the options that will show in this section are:
Title - This is the title of the notification, the default value will be related to your emergency type but can be overwritten.
Subtitle - This is the subtitle which sits below the title, it will default to text related to your emergency type but can be overwritten.
Text - This is the text which appears in your notification module, it will default to text related to your emergency type but can be overwritten.
-
Choose The Pages Your Module Is Displayed On
This section allows you to control the pages the module is displayed on. By default the module is set up to appear on every page of your website, however, you have two ways to control this.
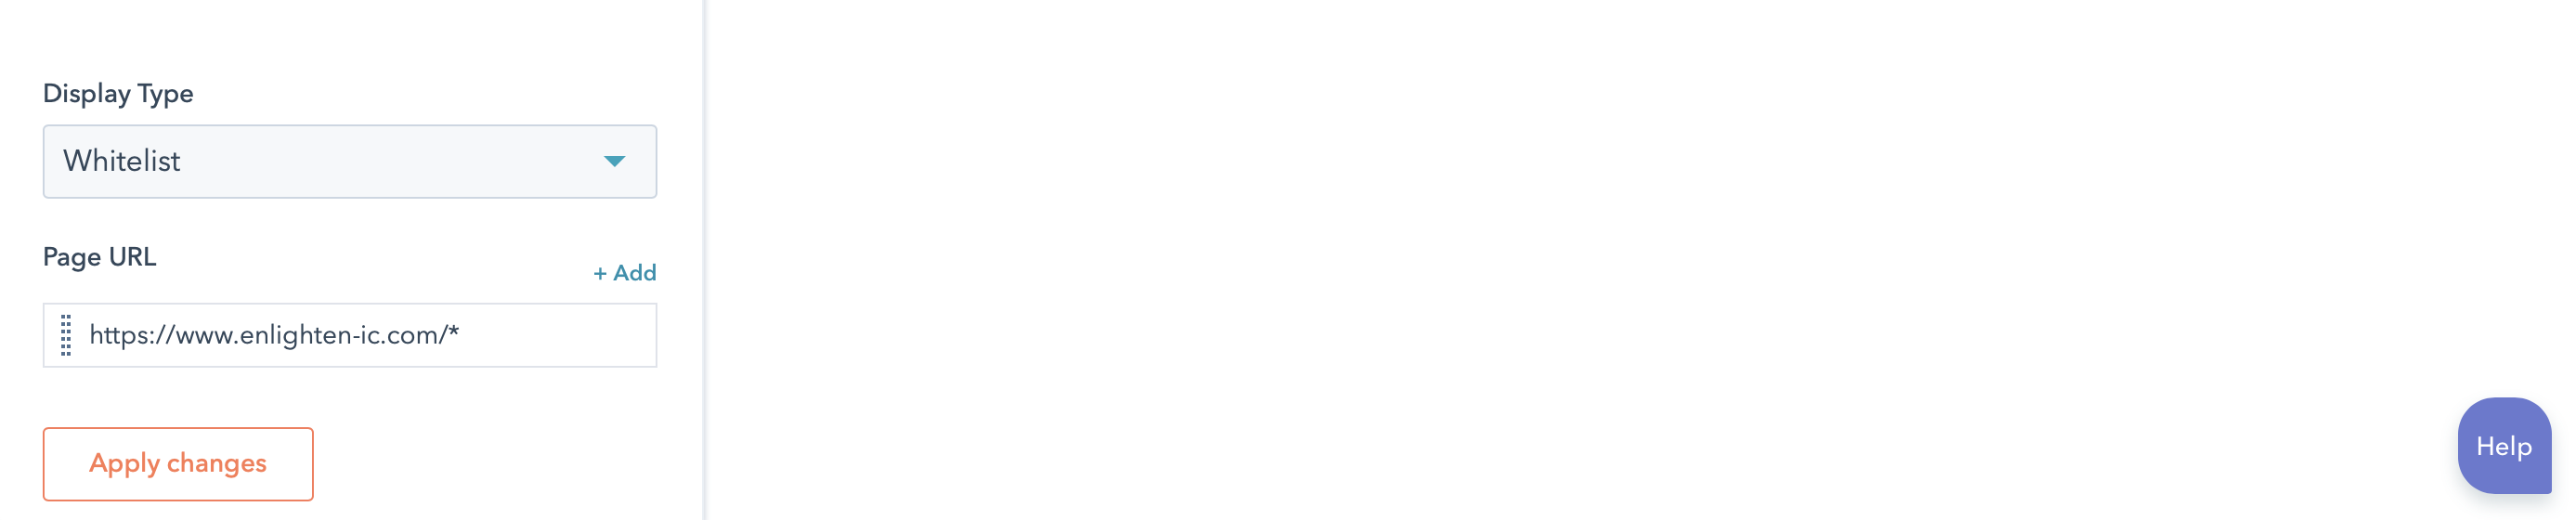
Whitelist
The module can be setup using a whitelist meaning that by default the module will be hidden on all website pages except the approved URLs on the whitelist. If the Display Type option is set to Whitelist the module will not appear on any of your website and blog pages except those with the page URLs defined under Page URL.Blacklist
The module can also be setup using a blacklist meaning that by default the module will appear on all website pages except those restricted URLs via the blacklist. If the Display Type option is set to Blacklist the module will appear on all your website and blog pages except those with the page URL's defined under Page URL.
WildcardsIf you would like to restrict the Emergency Notification so it doesn't appear on a whole section of your website you can use a wildcard operator to limit this. For example, if you want to turn off the Emergency Notification in your Services section and every page in the section follows the same URL pattern e.g. www.yourdomain.com/services/service-name you could use the wildcard operator '/*' to easily exclude this section by adding: www.yourdomain.com/services/*
-
Wait X Days Before Showing Again - This options allows you to set how many days the module will wait before being shown to a visitor again after it has been closed.
How To Install The Emergency Notification Module
Now you have set up the Emergency Notification Module you are ready to make it live on your website. There are several ways to add a HubSpot module into your website but to provide maximum flexibility and ease of control we recommend you follow the process below:
-
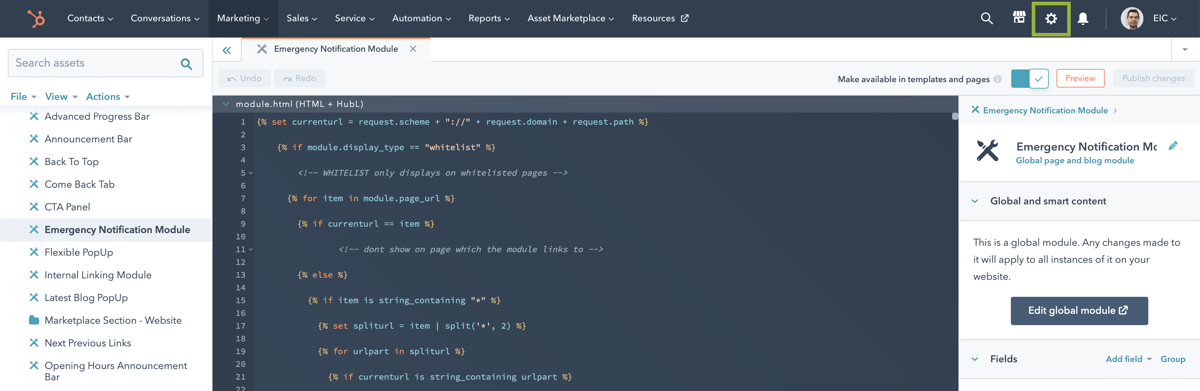
Navigate to Marketing > Files and Templates > Design Tools and select Emergency Notification Module from the left hand side menu (It will be listed in a folder named Marketplace).
-
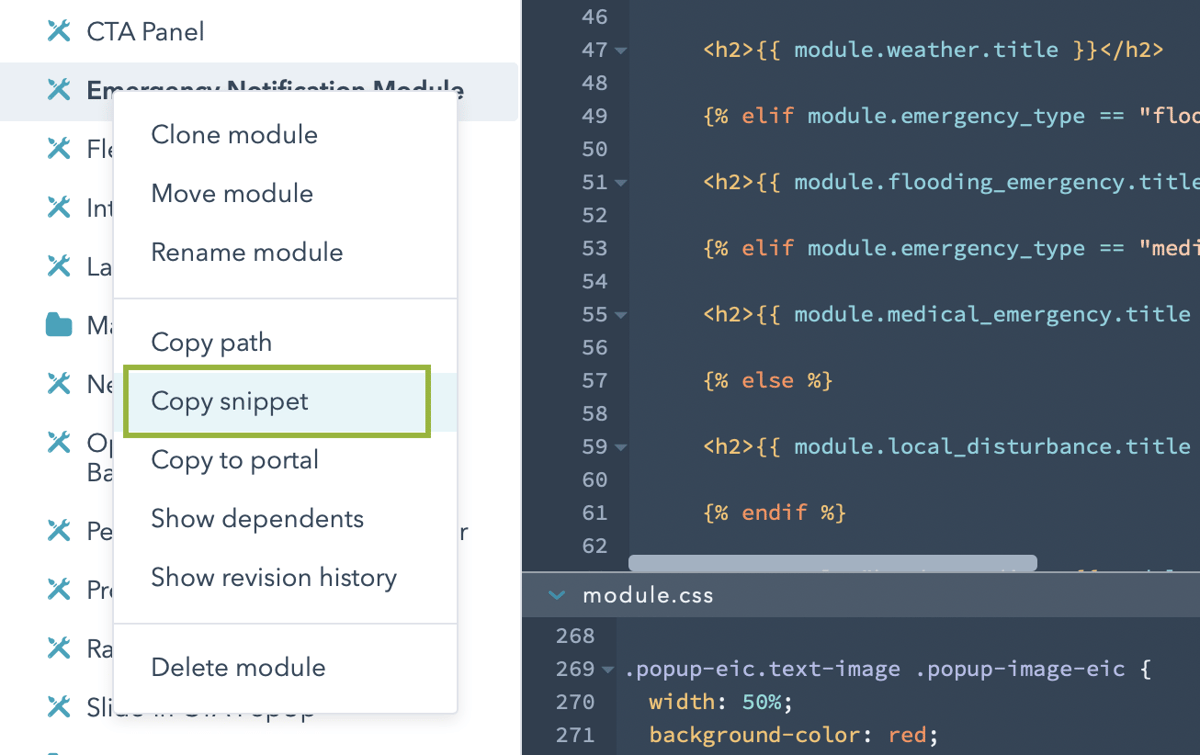
Right click and select Copy Snippet
-
Select the Settings icon (⚙) which will load your HubSpot portal's settings
-
From the left menu select Website to open the submenu...
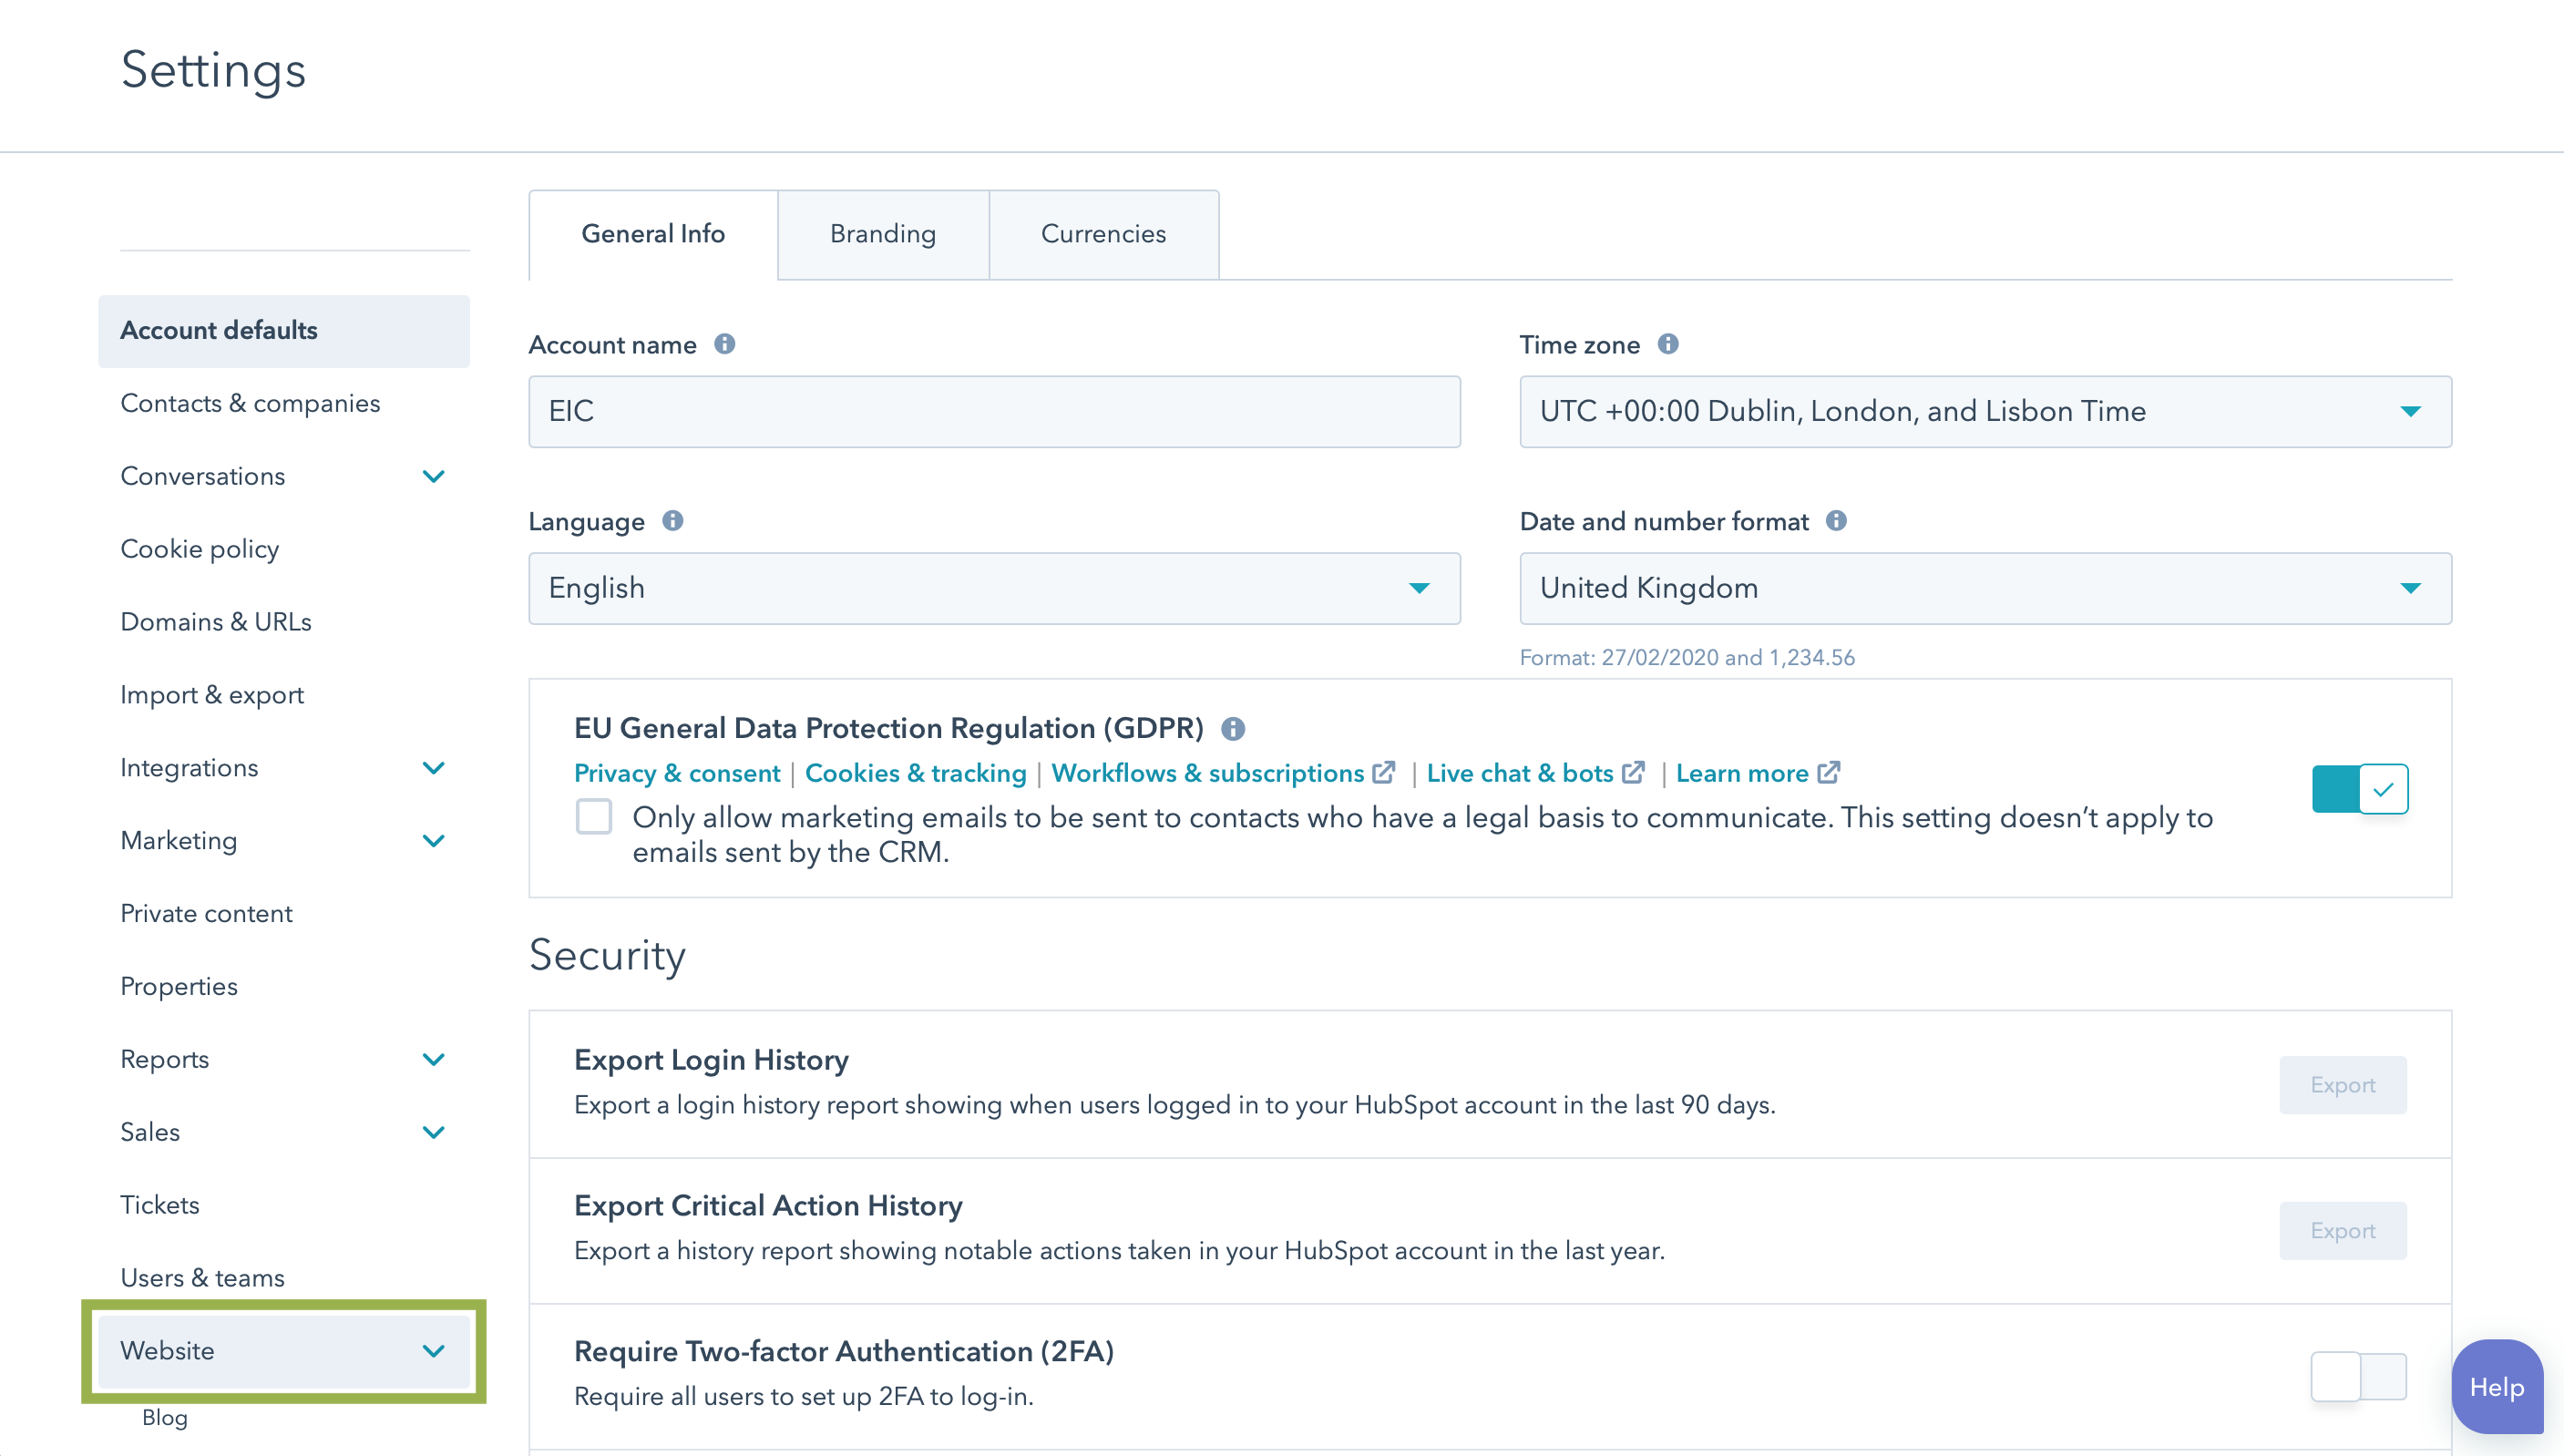
...and then select Pages
-
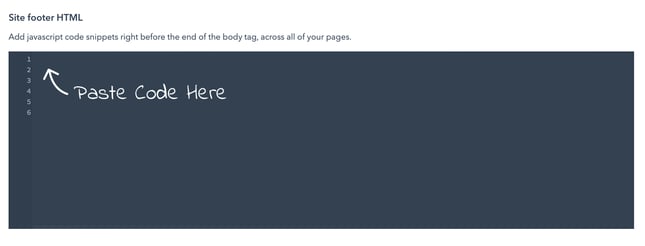
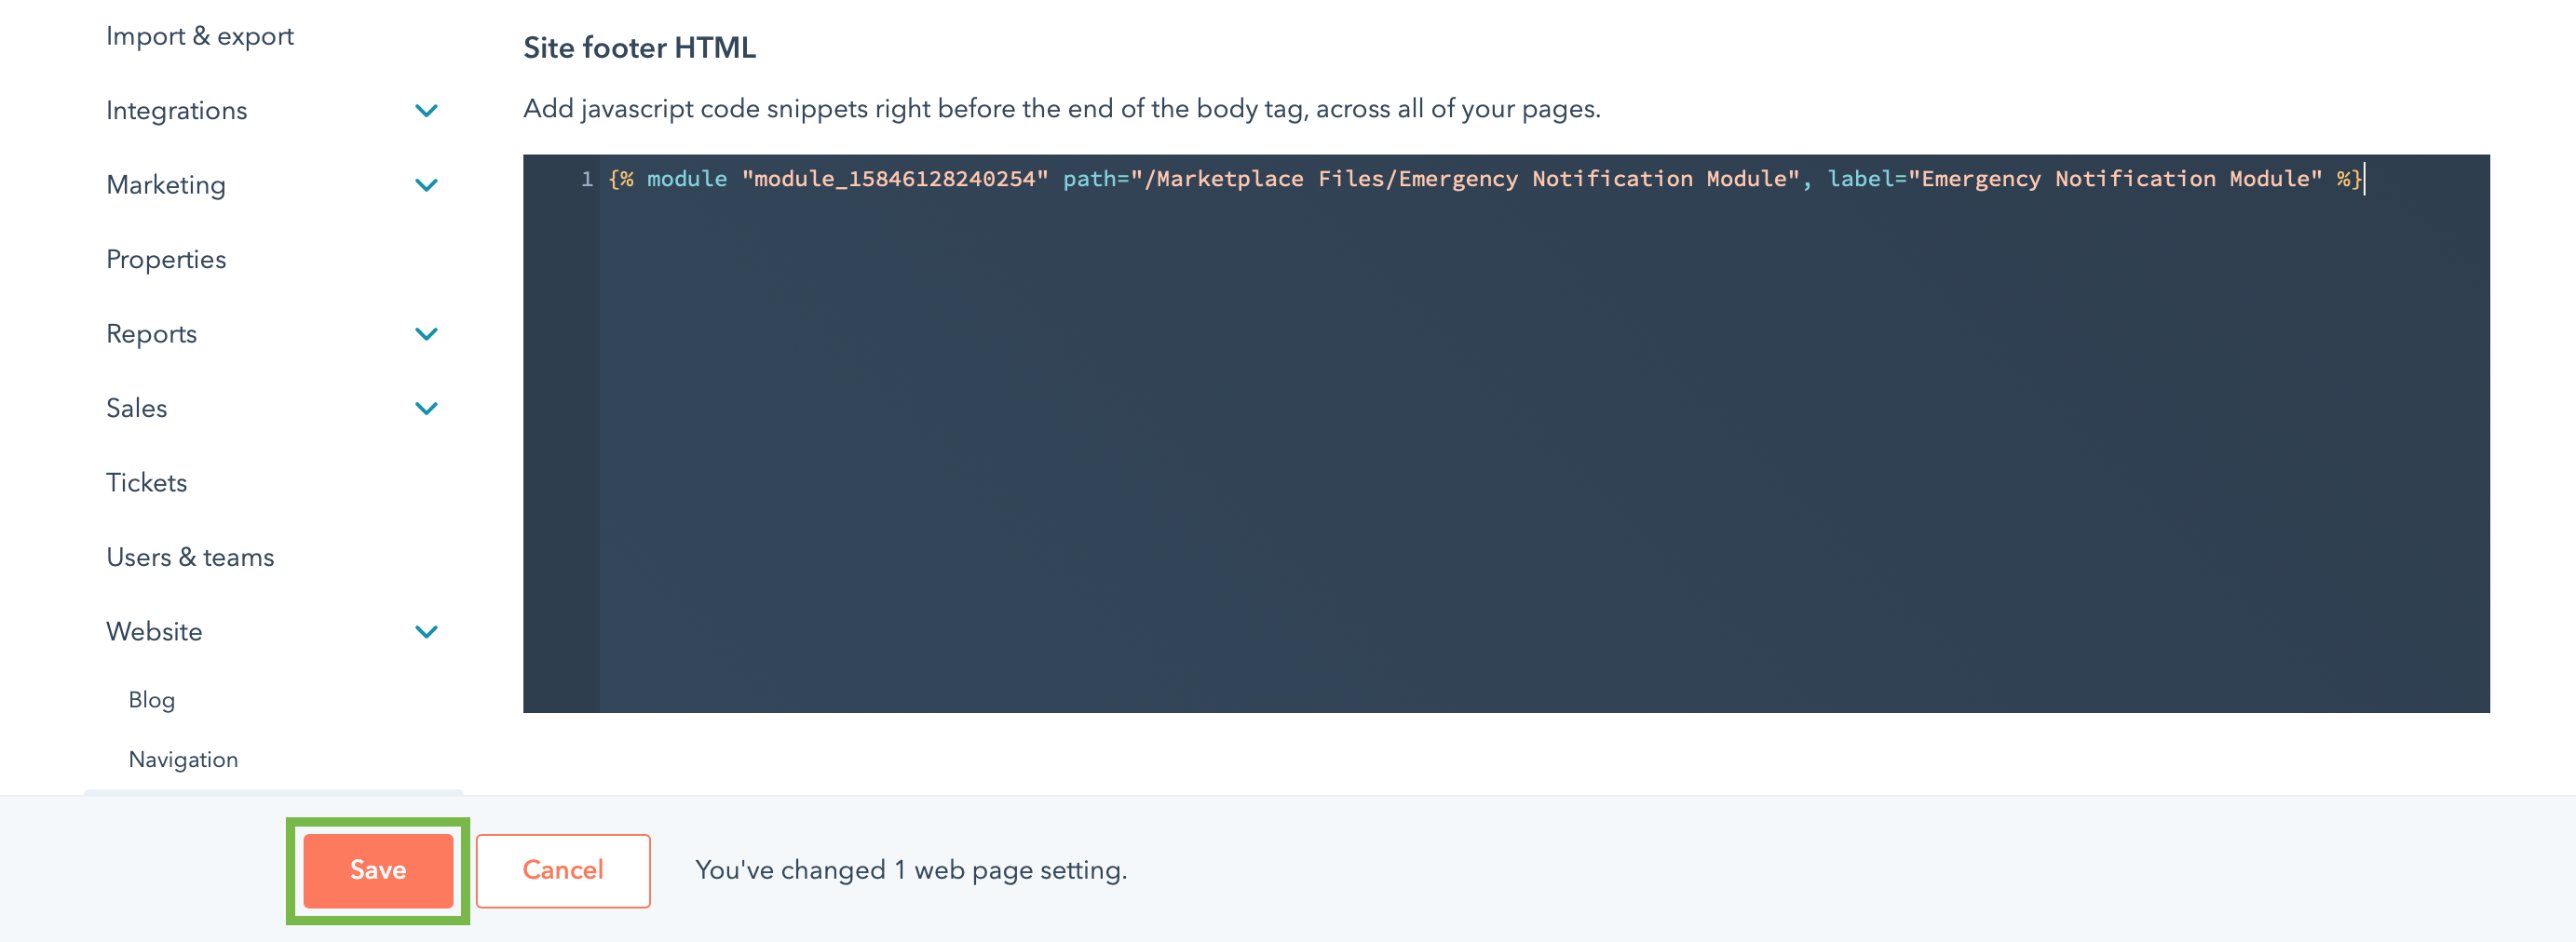
Paste the module's snippet into the section titled Site footer HTML and click Save.
-
A Save button will appear and once you click this your Emergency Notification Module will be live across the pages you have specified. If you have left the module with the default settings it will roll out across all of your HubSpot pages.
Final Thoughts
We have tried to build as much functionality into this module as possible without making it too complicated. If, however, you have specific requirements for your business, please get in touch and we will see if this module can be customised further to meet your needs or if a bespoke module would be more appropriate.
Looking For
Custom Development?
We provide development solutions for companies and agencies who need help building their websites from scratch or adding custom functionality along the way
Get In Touch